Manage your restaurant settings
Edit your profile, logo, opening hours, timezone, currency, languages, and SEO in Vino Settings, and hide Powered by Vino.
Your Restaurant Settings page is where you manage your profile, brand identity, opening hours, localization, and search engine optimization in one place. Getting these right keeps your public menu accurate for diners and helps people find you in Google Search.
Open the Settings page
Go to Settings from the main dashboard menu. Everything is grouped into four tabs along the top, Profile, Hours, Localization, and SEO, and a sticky save bar sits at the bottom of the page. The form automatically detects unsaved changes, so as soon as you edit a field the save bar offers Save changes and Discard.
Edit your profile and brand
Click the Profile tab to manage your core identity. Here you can update your restaurant name, upload a logo, review your public menu URL, and fill in your contact details. The logo should be a square image (192x192 pixels minimum recommended, PNG or WebP) and is reused as your favicon, the center of your QR code, and your menu header.
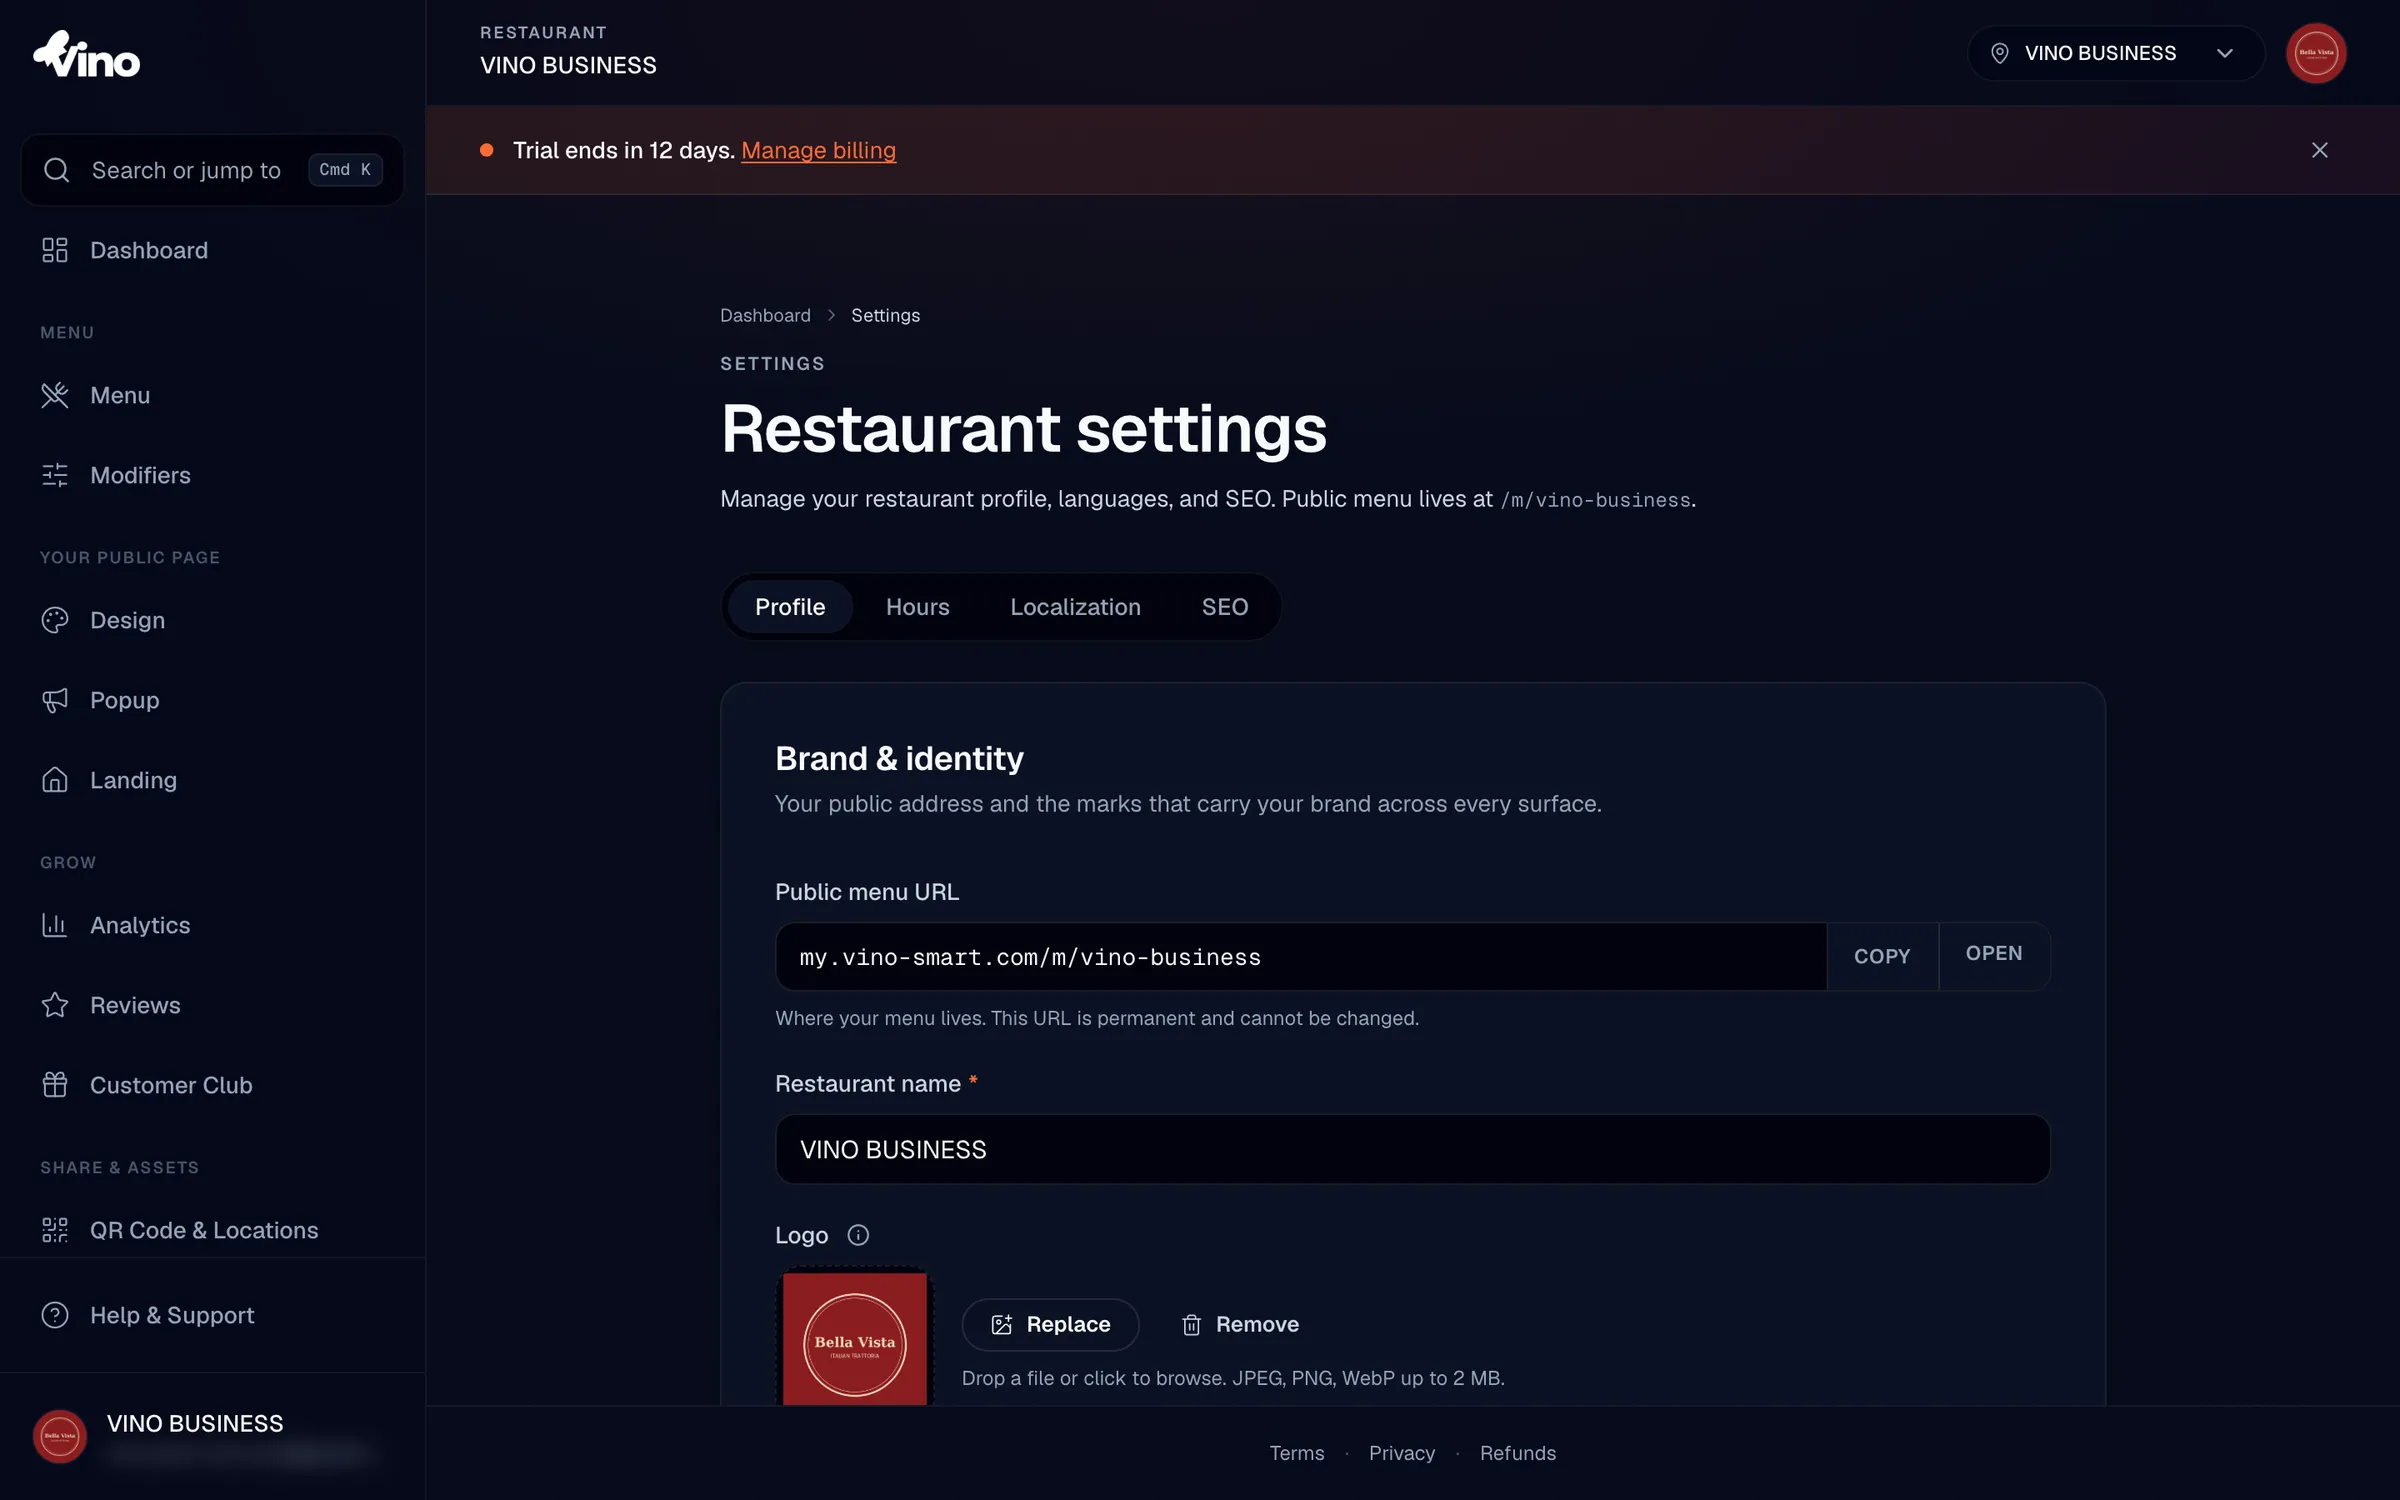
The Profile tab includes these fields:
| Setting | Details |
|---|---|
| Restaurant name | Your restaurant's display name (required). |
| Logo | Square image upload, used as favicon, QR center, and menu header. |
| Public menu URL | Read-only display of your permanent link (for example, my.vino-smart.com/m/your-slug). Copyable; it cannot be changed after creation. |
| Brand color | Read-only swatch of your identity color. Defaults to platform orange (#FF6B35) if not customized. |
| Phone, contact email | Optional contact details shown on your public menu. |
| Street, city, postal code, country | Optional address fields for location context. |
Your public menu URL (slug) is set when you create your account and is permanent, so it cannot be changed from Settings. The brand color and cover image are edited in the Design tab, not here. Settings shows the color read-only and never touches your cover image, so saving Settings can never accidentally blank an existing cover.
Add your social links
Still on the Profile tab, add or update your social links to connect with diners. You can add URLs for your website, Instagram, Facebook, TikTok, and WhatsApp, and each one you fill in appears on your public menu. All social fields are optional, so add only the channels you actually use.
Set your opening hours
Click the Hours tab to set when you are open. Toggle each day open or closed, then add time windows for that day. You can add up to four windows per day using 24-hour HH:MM format, which lets you handle split schedules such as a separate lunch and dinner service with a break in between. To fill several days quickly, use the Copy to weekdays, Copy to weekend, or Copy to all shortcuts. Vino validates your entries inline and detects overlapping windows.
You can also record special closures for holidays or maintenance days. Add the date and an optional reason, such as "Christmas Day" or "Renovations," and that reason displays to diners on your menu.
Configure localization
Click the Localization tab to set your timezone and currency. Your timezone keeps times and opening hours accurate (UTC, Europe, Americas, and Asia regions are supported), and your currency dropdown (USD, EUR, GBP, and others) controls how prices are formatted, including the symbol shown.
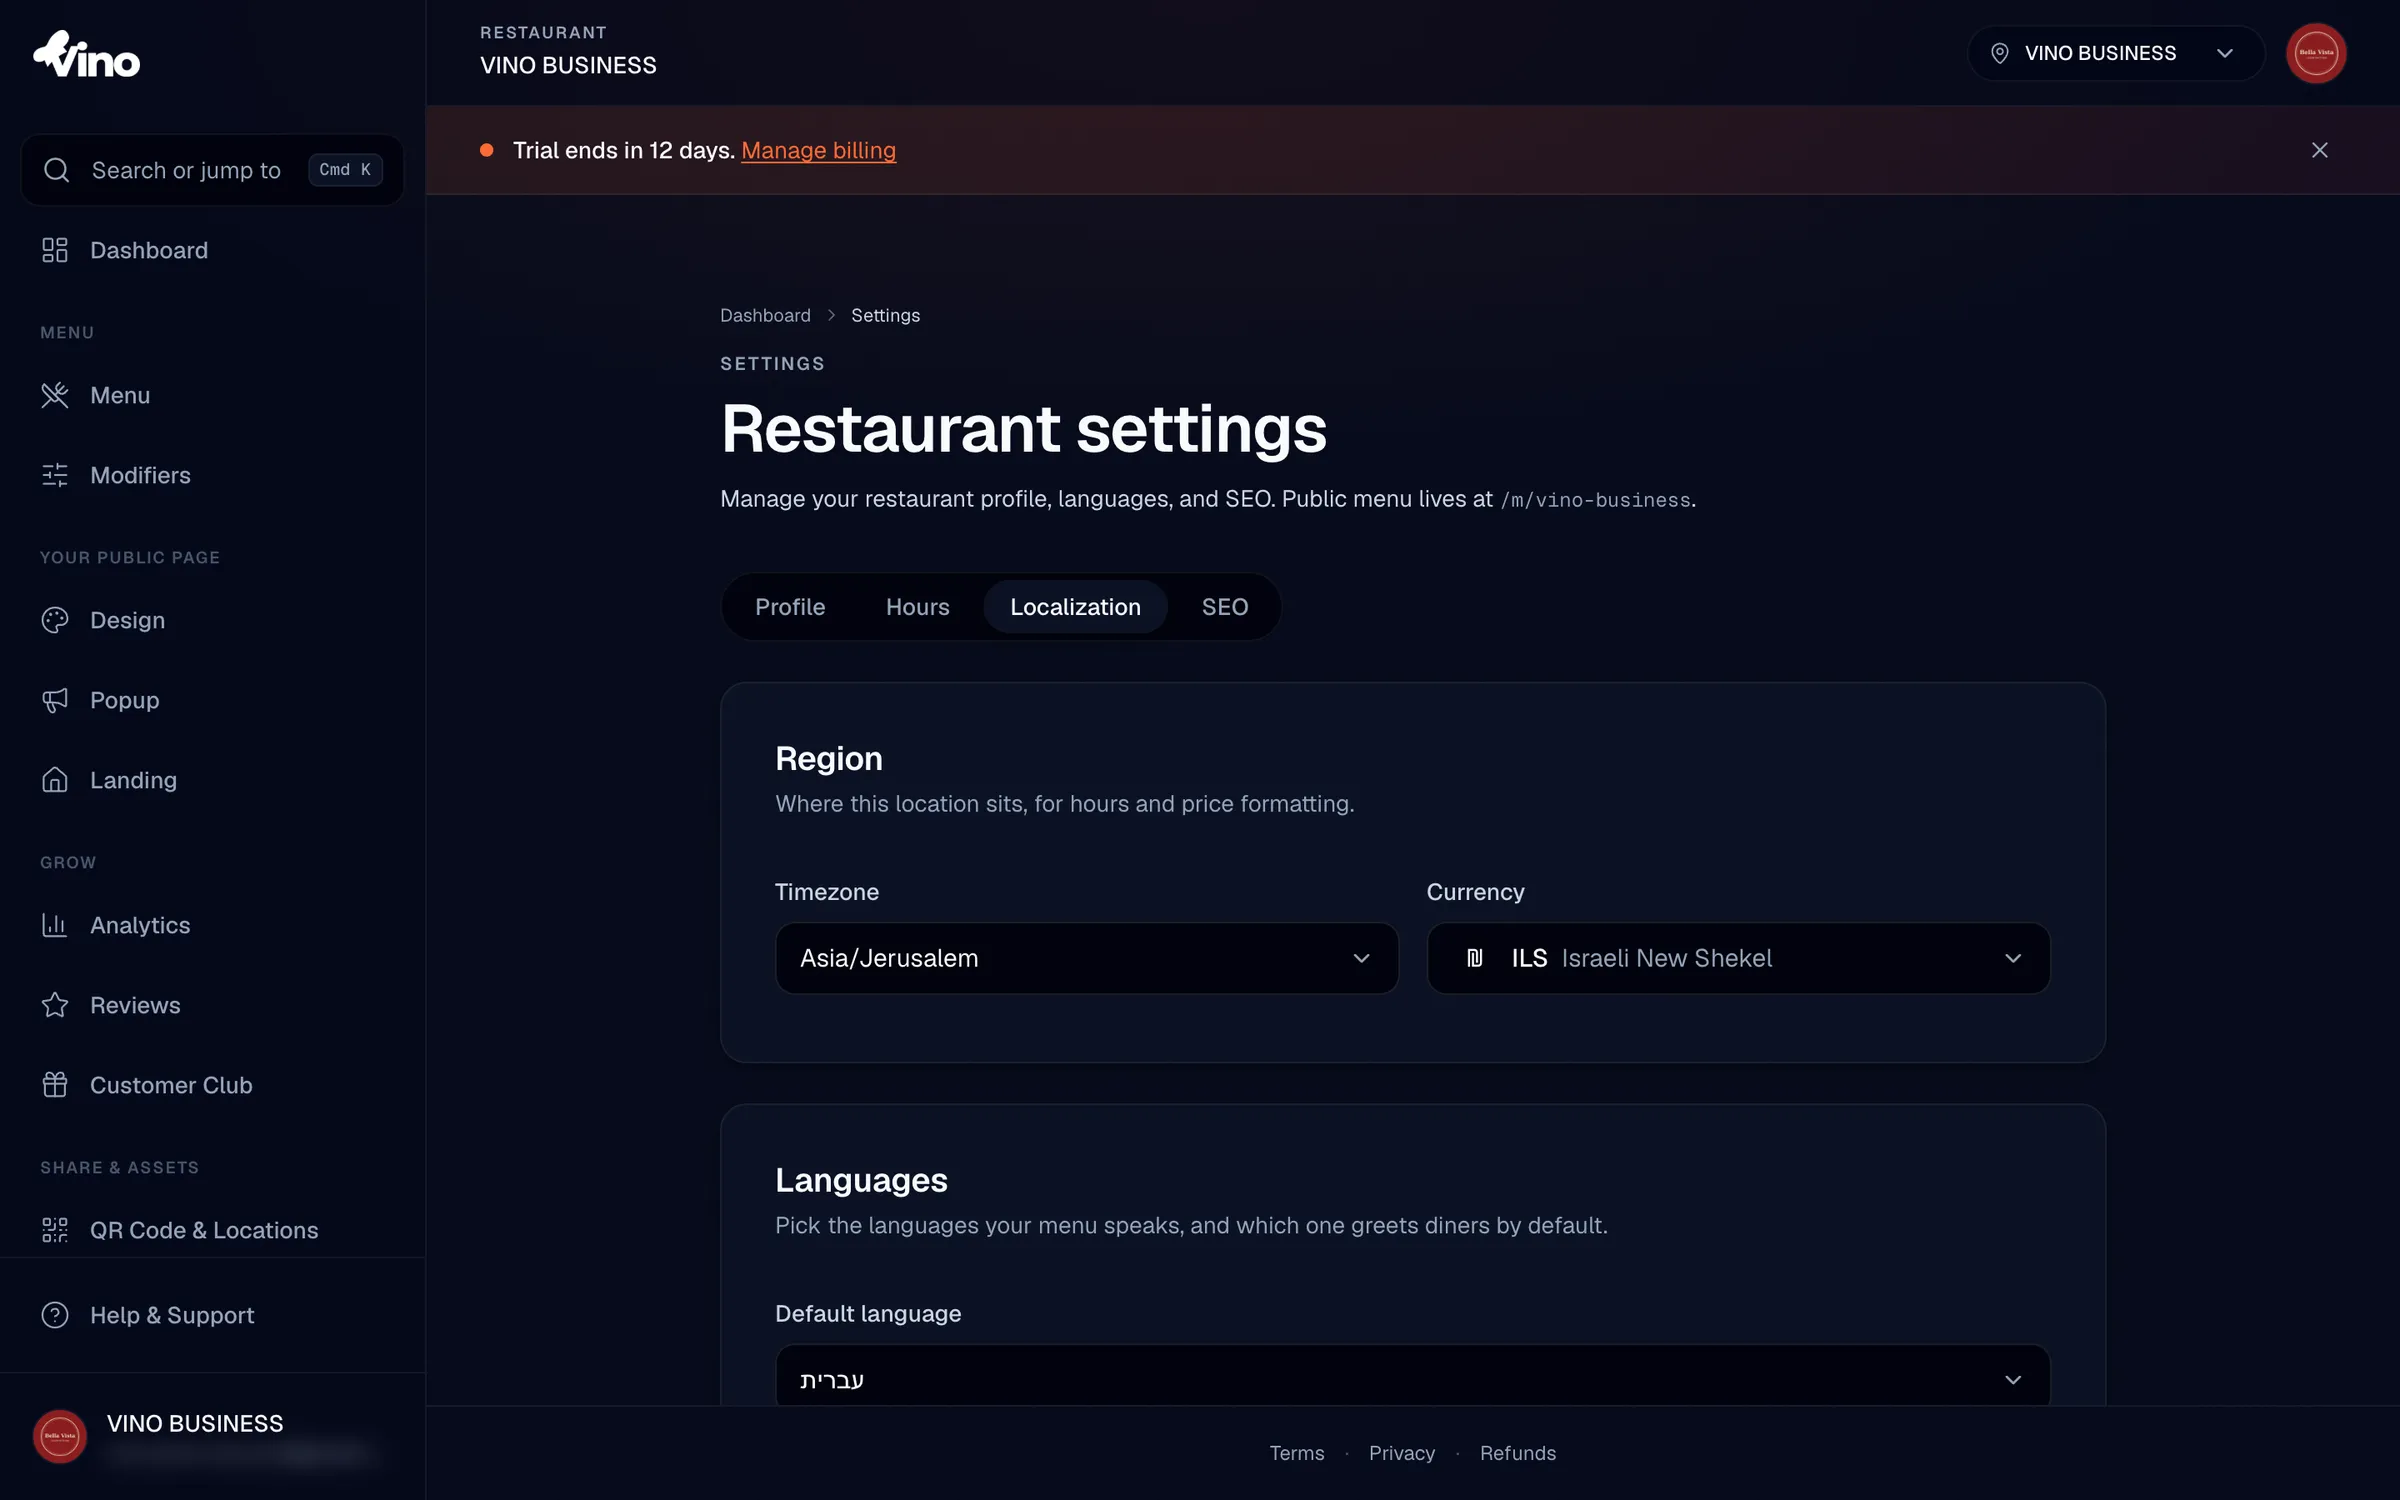
Below that, set your default language and choose which additional languages your menu supports:
- Default language: pick one from the supported languages (English, Deutsch, עברית, العربية, Español, Français, Italiano, Português, Русский). It must be one of your enabled languages.
- Enabled languages: use the toggle grid to choose every language your menu offers. Your default language is always included and cannot be disabled.
Changing your default language triggers a confirmation dialog because your menu is re-indexed, which can temporarily shift search rankings. The new default must already be in your enabled languages list.
Turn on AI auto-translate
On the Localization tab, you can toggle Auto-translate empty fields so AI automatically fills in missing language translations whenever you save a menu item. When you switch it on, or when you add a new language, Vino also catches up your existing menu items.
For more on translation, see the ai-menu-translation article.
Optimize for Google Search
Click the SEO tab to control how your menu appears in search results. Write an SEO title (aim for 50 to 60 characters) and a description (aim for 150 to 160 characters), then add keywords, your cuisine type, a price range, and an optional Google Place ID. Each text field has a character meter that turns green, yellow, or red so you can hit the recommended length. Use the Google Search preview with its desktop and mobile tabs to see exactly how your menu will look before you save.
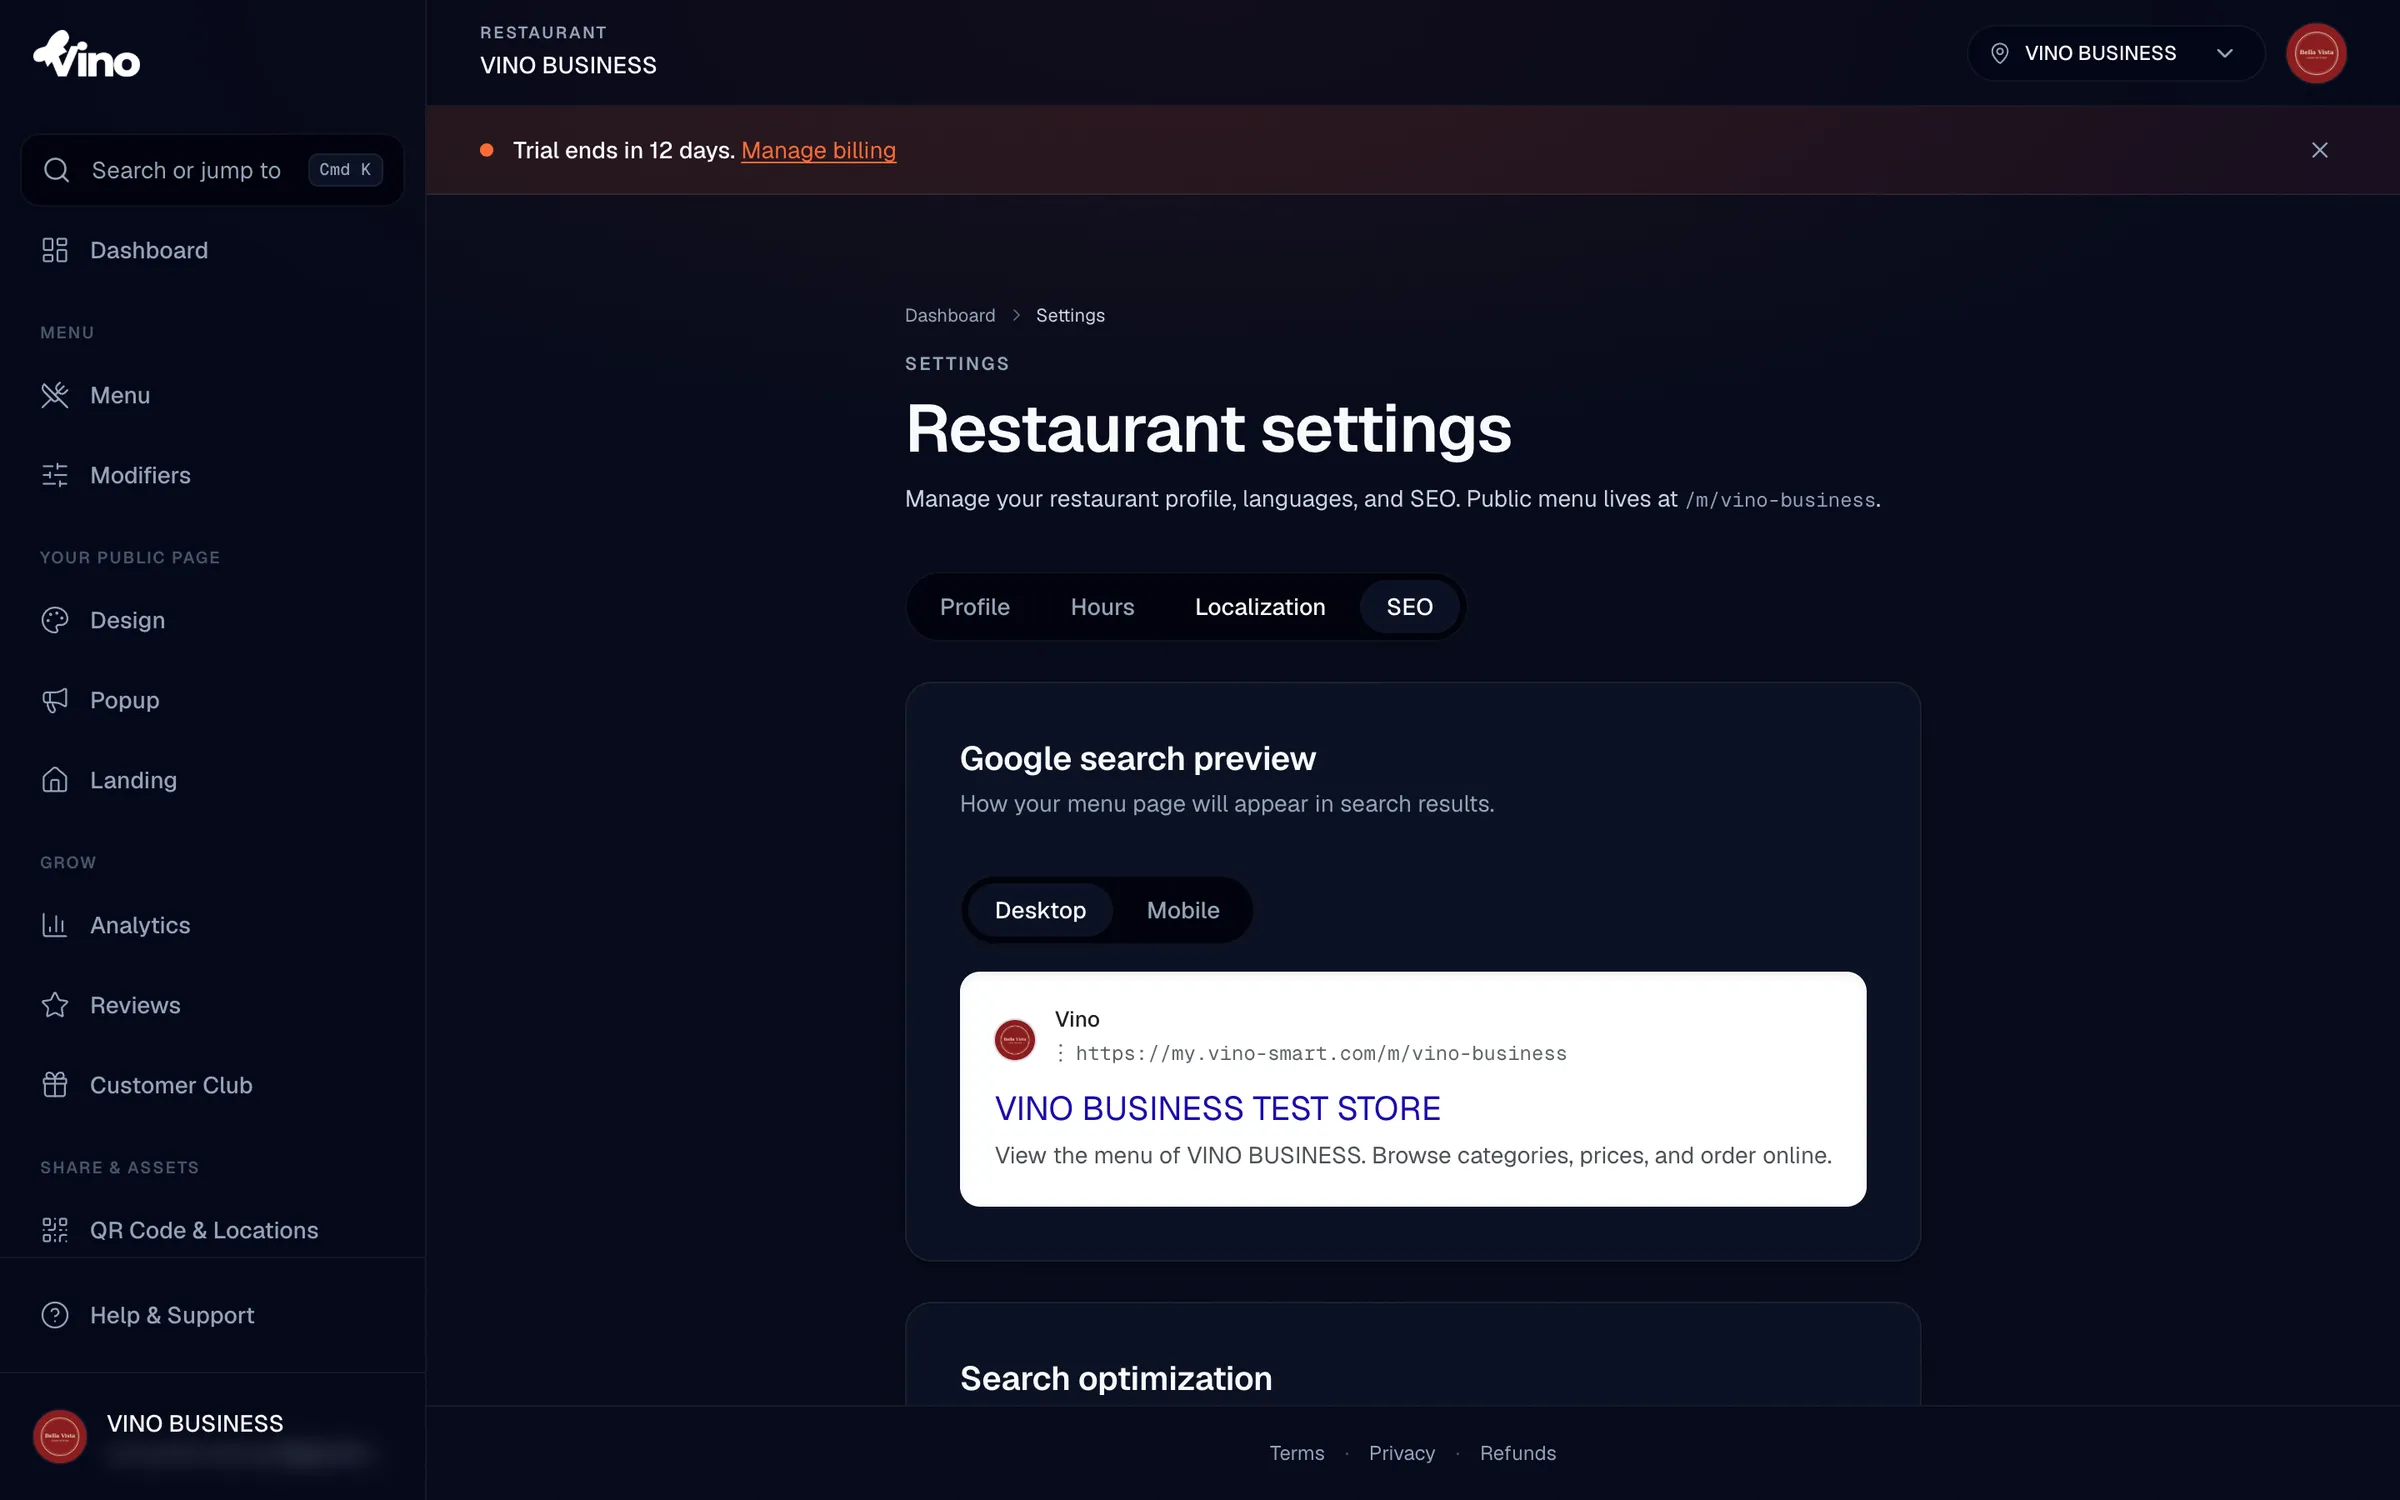
The SEO tab includes these fields:
- SEO title: up to 120 characters (aim for 50 to 60). Shows as the blue clickable headline in Google.
- SEO description: up to 320 characters (aim for 150 to 160). Appears as the grey text under the title.
- SEO keywords: a comma-separated list (up to 30) that influences indexing and internal categorization.
- Cuisine type: a comma-separated list (up to 20) for Google's rich restaurant card, using common labels like "italian" or "vegan."
- Price range: a radio selection of
$,$$,$$$, or$$$$based on cost per person, used for Google's restaurant card. - Google Place ID: an optional ID starting with
ChIJfrom Google's Place ID Finder that links your menu to your Google Business Profile.
Hide the Powered by Vino badge
Open the Visibility section and toggle Hide Powered by Vino to remove the Vino branding badge from the header and footer of your public menu.
Save your changes
When you are done, click Save changes in the sticky bar at the bottom to persist your edits, or click Discard to revert them. The form auto-detects unsaved changes, so the save bar appears whenever you have something pending.
Still stuck? Email us at info@vino-smart.com and we will help you get your settings sorted.
Was this helpful?