Build a branded landing page for your menu
Turn on a welcome screen before your menu: pick a layout, add a hero, CTAs, quick links, contact shortcuts and social links.
The landing page is a branded welcome screen diners see before your menu when they scan your QR code. They land here first at /m/[slug], take in your hero, buttons and contact shortcuts, then tap through to the menu, which makes a polished first impression and puts bookings, directions and social profiles one tap away.
Open the Landing editor
From your Vino dashboard, open Landing in the left navigation. The editor is organized into sections, Look, Header, Actions, Contact actions and Social, with a live mobile preview on the right that reflects your unsaved changes as you work, so you always see exactly what diners will get.
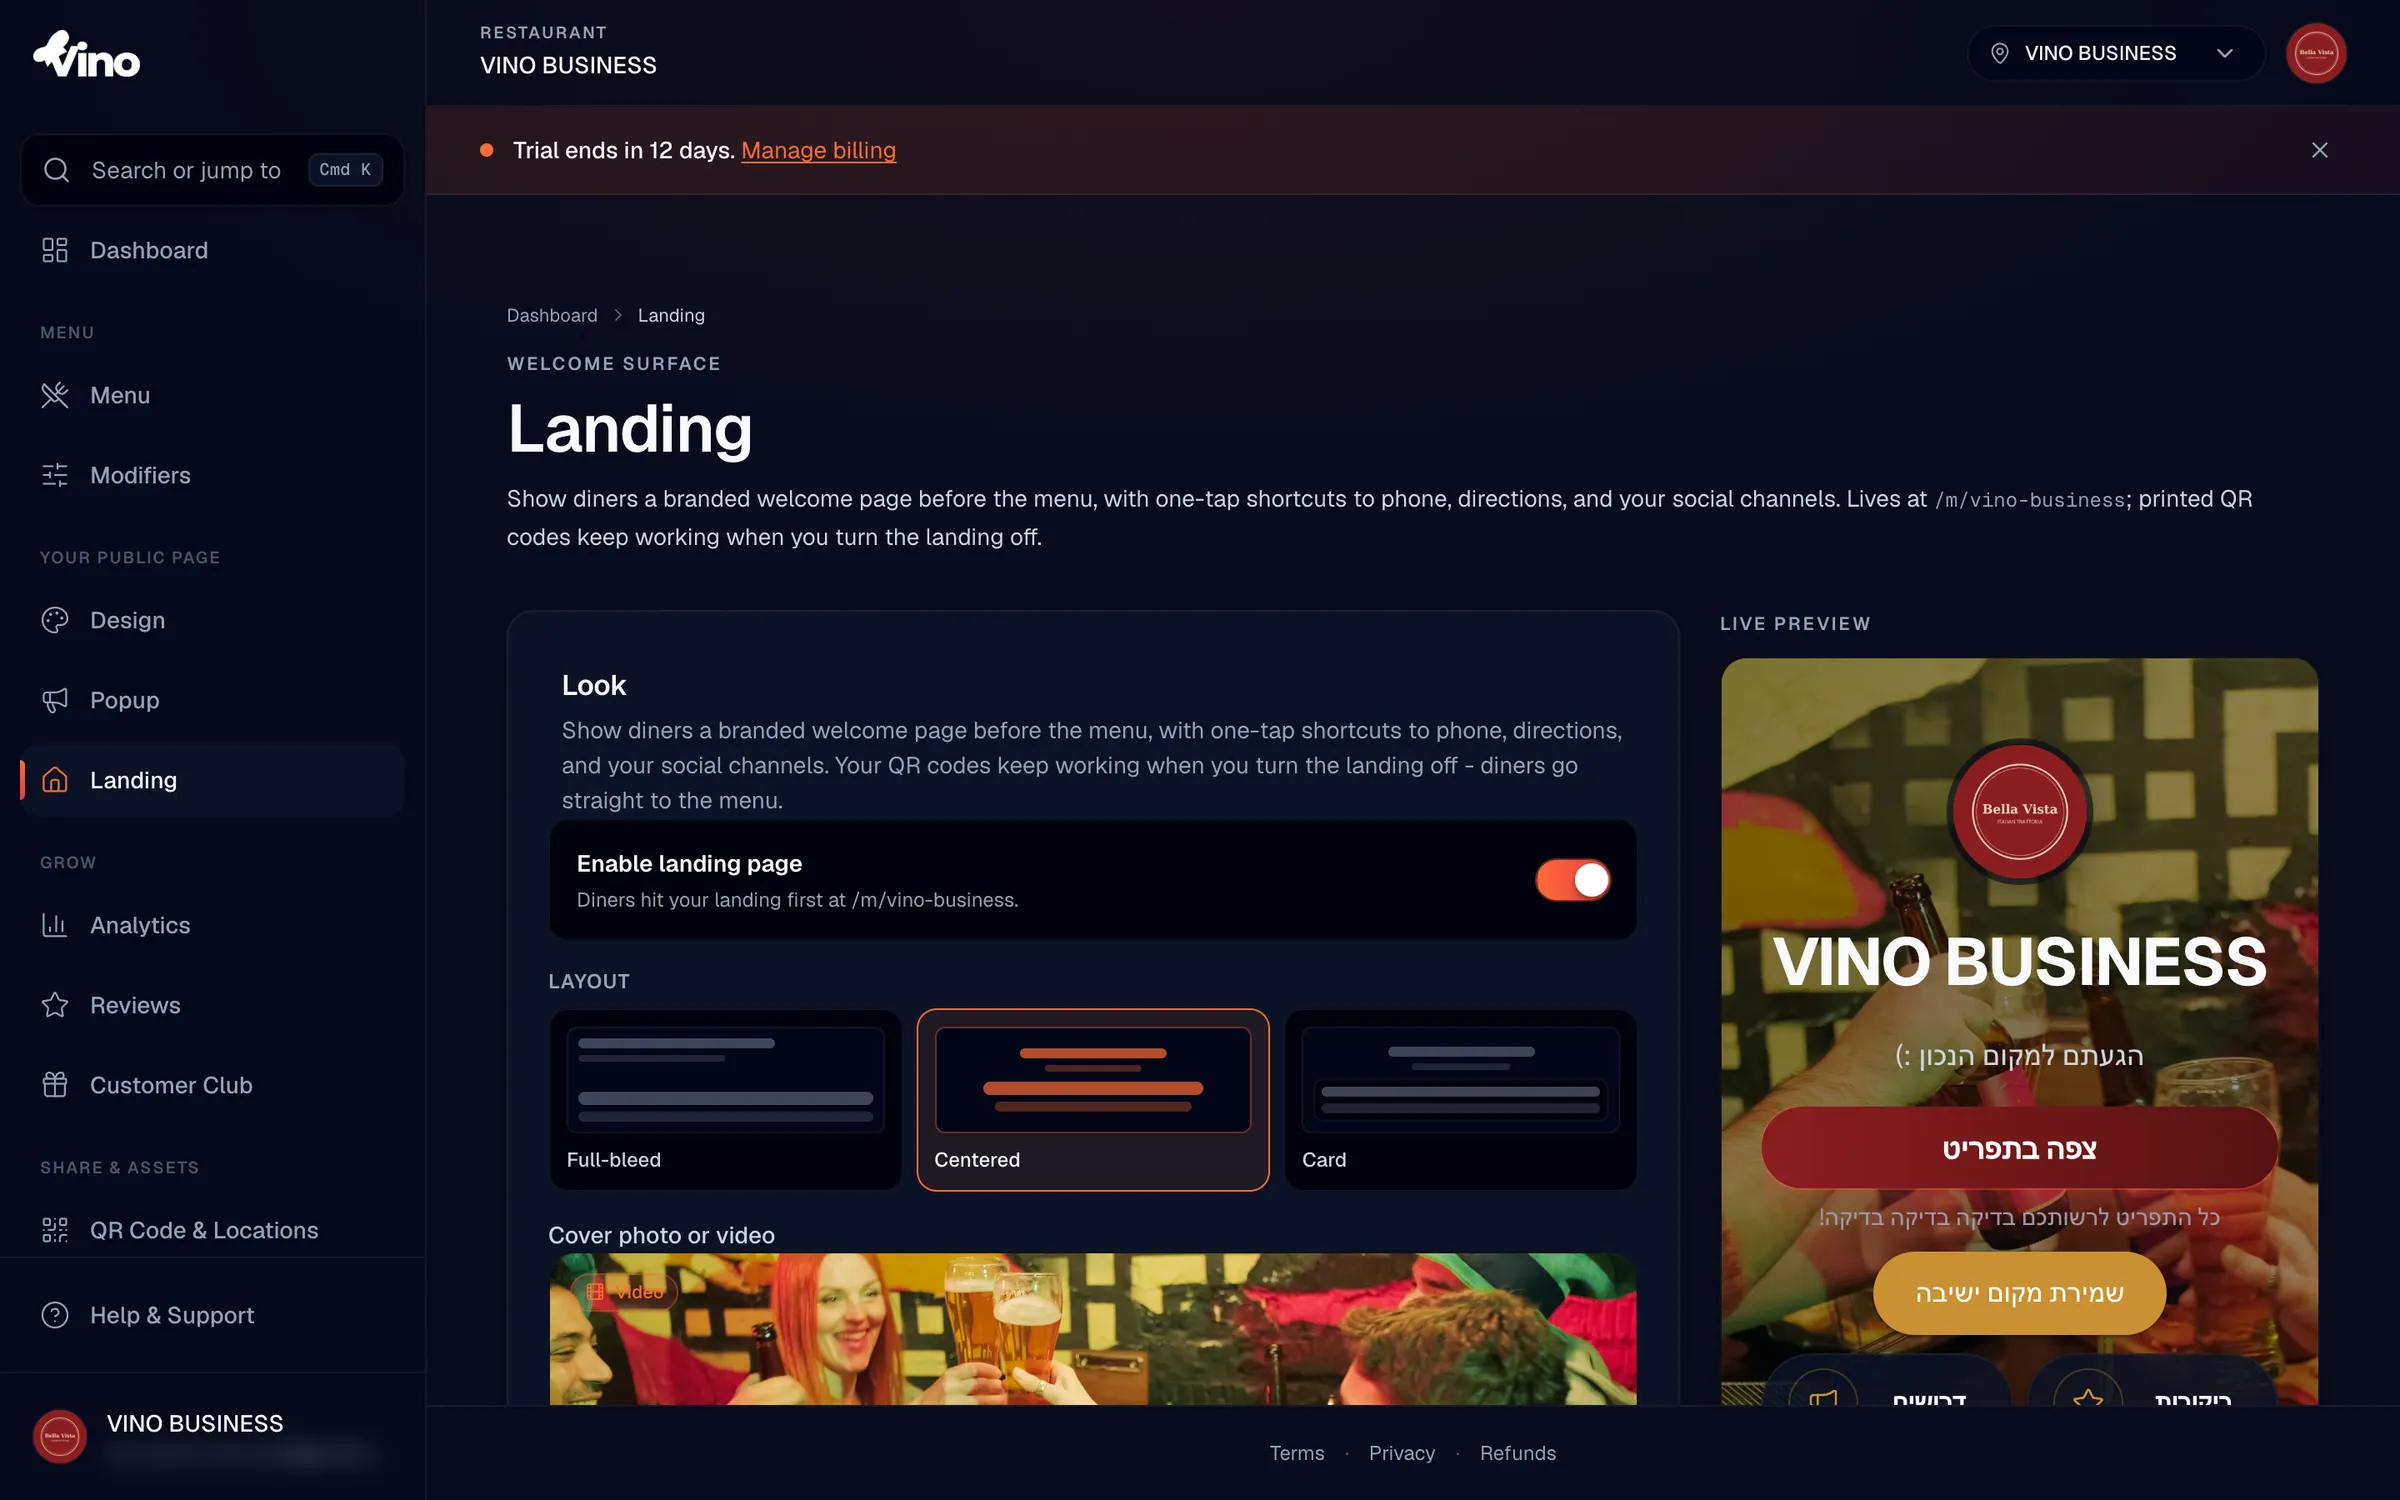
Enable the landing page
In the Look section, switch Enable landing page on to activate the feature and make it visible to diners. Until you turn this on, scanned QR codes go straight to your menu with no changes needed, so enabling or disabling the landing page never requires you to reprint anything.
When the landing page is disabled, your printed QR codes still work and diners go straight to the menu. It is completely backwards compatible, so you can turn the welcome screen off at any time without touching your codes.
Choose a layout
Still in Look, pick the layout that suits your brand. Each option arranges your hero and buttons differently, and the preview updates instantly so you can compare them.
| Layout | Arrangement |
|---|---|
| Full-bleed | Actions pinned to the bottom over a full-screen background |
| Centered | Identity and actions stacked in the middle |
| Card | Header background with a floating action card overlaid |
Add a cover photo or video
Upload a cover photo or video as your hero background. If you upload a video, Vino automatically generates a poster image so your landing still looks right when it is shared on social media. If your background is busy or bright, drag the Photo/video darkening slider (0 to 100%) to add a dark overlay so your title and buttons stay readable.
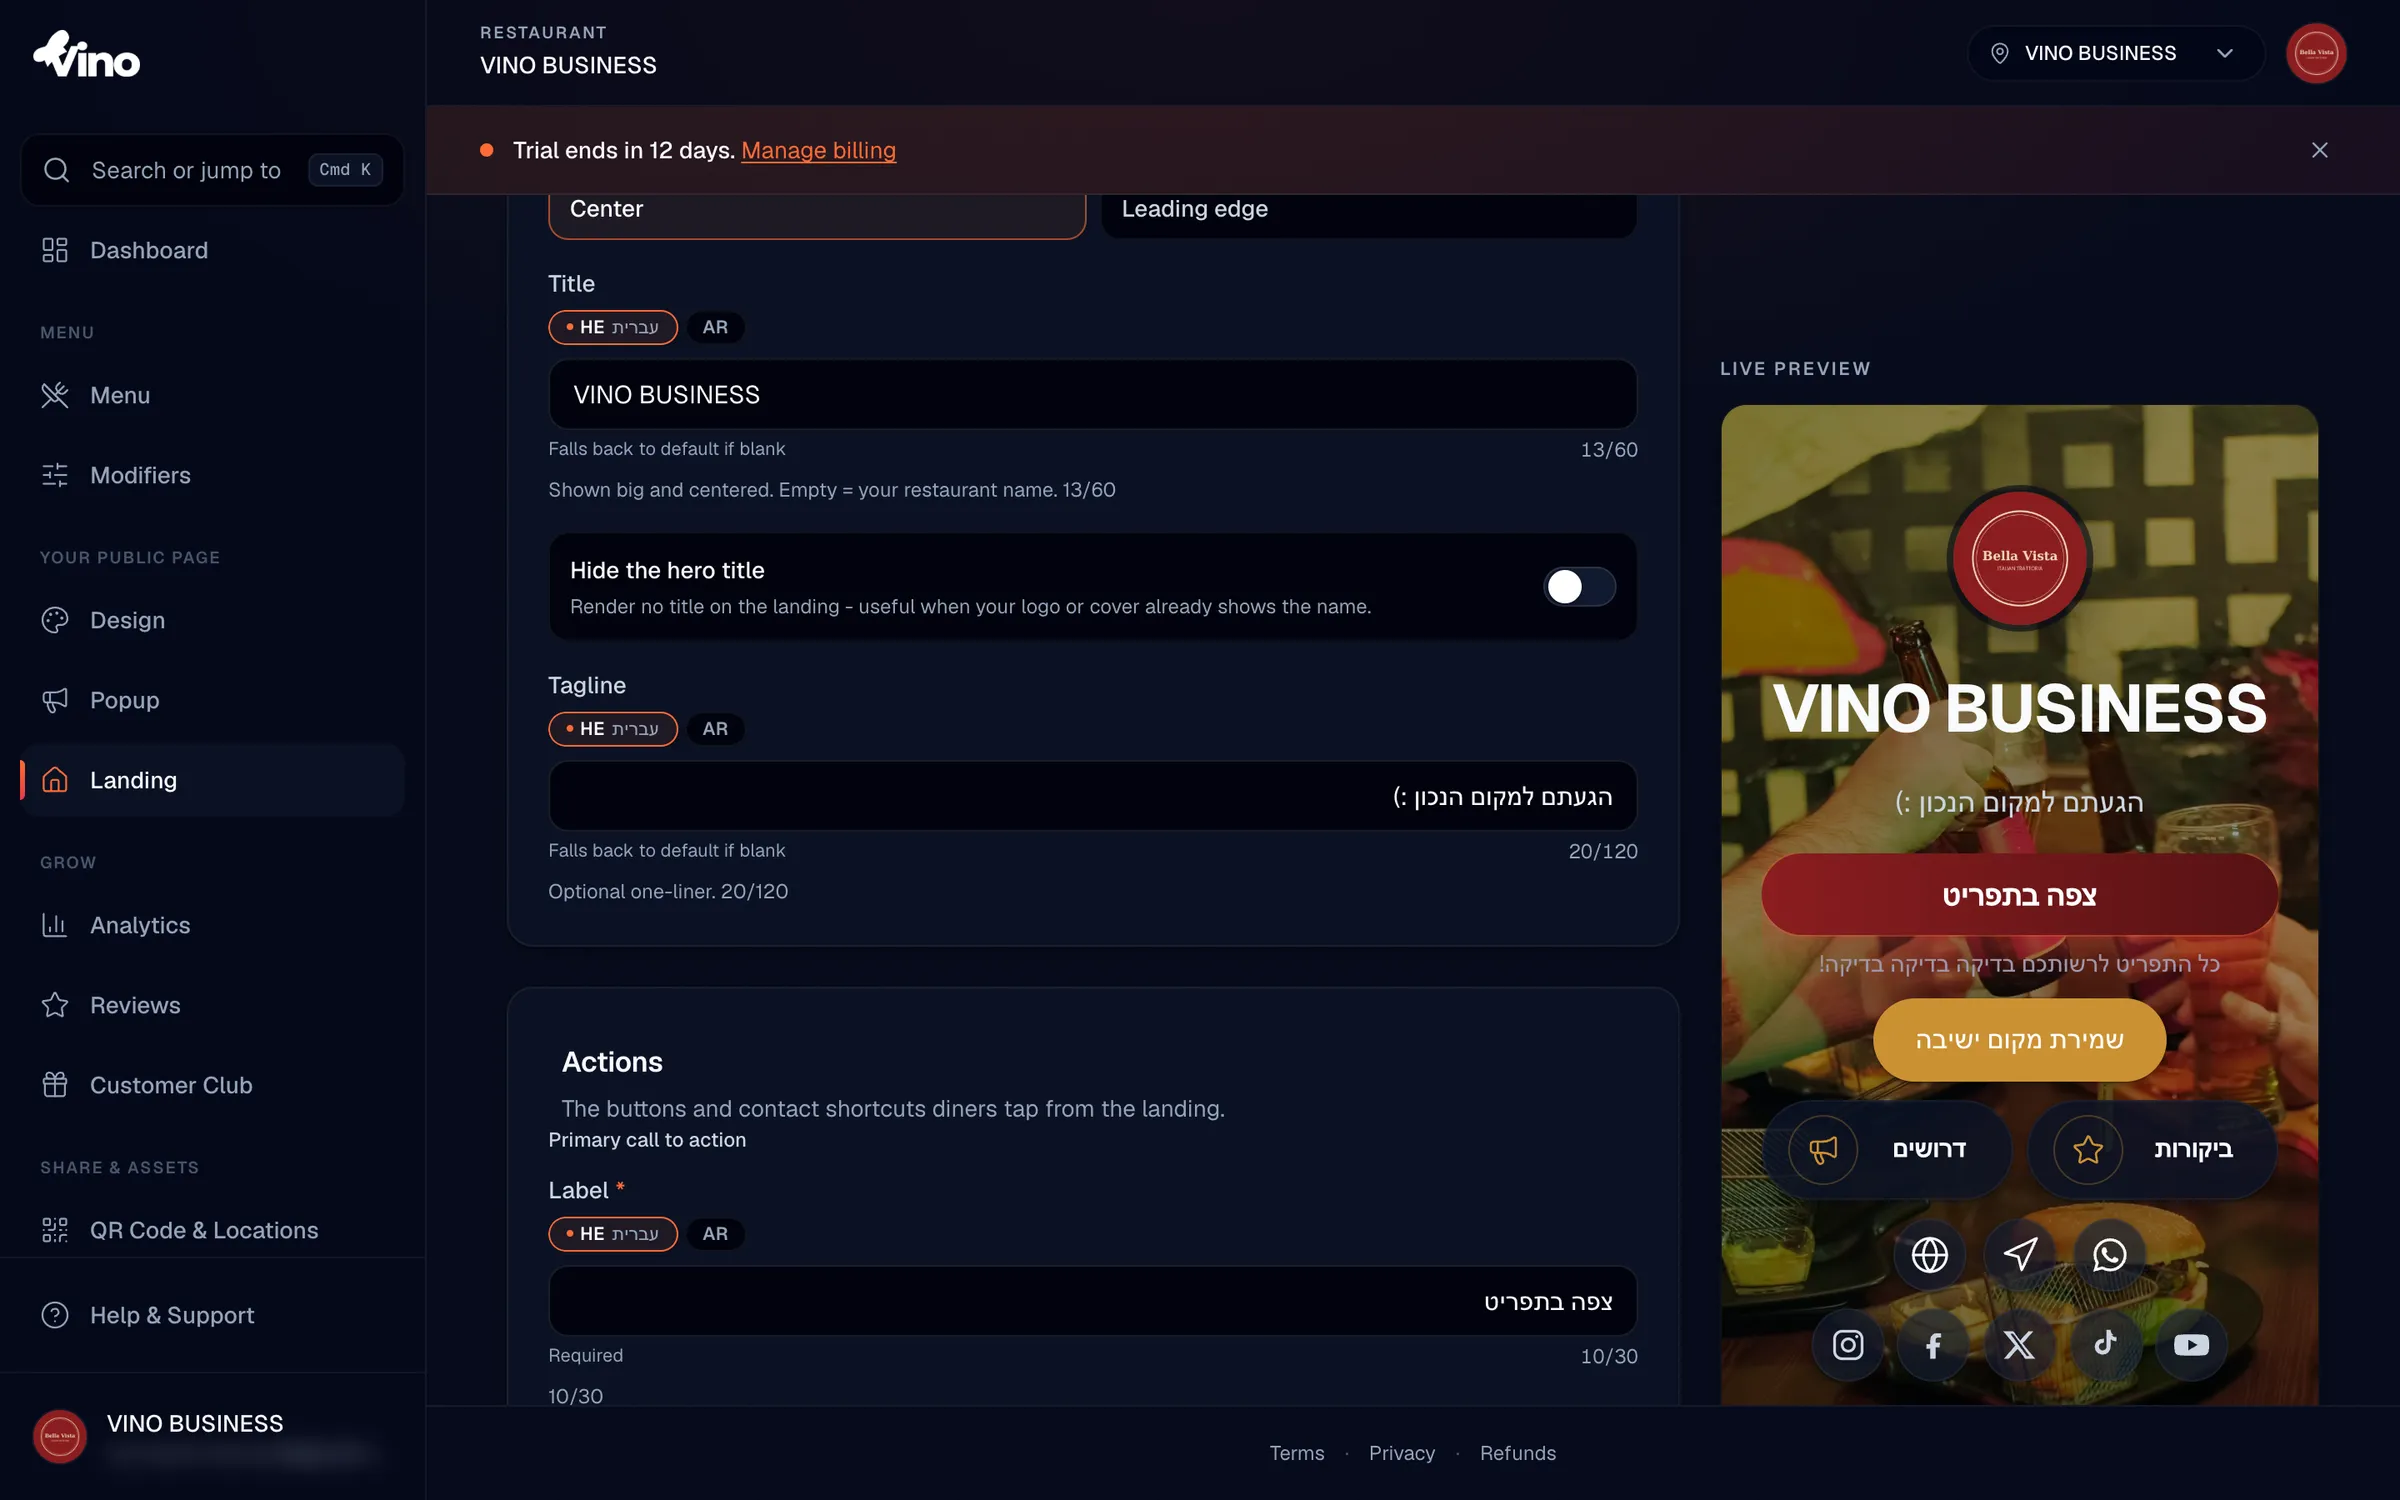
Set your hero text and colors
Set your hero title (up to 60 characters), or leave it empty to use your restaurant name automatically, and optionally add a tagline of up to 120 characters. If your cover photo already shows your name, switch on Hide the hero title to keep things clean. Then tune your colors to match your brand, leaving any field empty falls back to your brand defaults.
- Accent color sets buttons and highlights
- Background color overrides the page background (empty uses a warm default)
- Text color overrides text, with contrast checking against your background (empty auto-picks a contrasting color)
All color fields accept standard 6-digit hex codes (for example #FF6B35). Leave a field blank to fall back to your brand default or an auto-selected contrasting color.
Position your logo
In the Header section, choose where your restaurant logo sits in the hero by picking Center or Leading edge. Your logo is loaded from your branding settings, so this only controls its placement, not the image itself. Use this section together with your hero text to finish the look of the top of the page.
Configure your call-to-action buttons
In the Actions section, set the primary CTA label (up to 30 characters, defaulting to "View menu") and an optional subtitle of up to 60 characters. The primary button always navigates to your menu, so this is the main button diners tap to start ordering. You can also switch on a secondary CTA for something like a booking link.
- Secondary CTA label up to 30 characters (translatable on multi-language menus)
- Secondary CTA URL must be a valid HTTPS link
- Secondary CTA color is an optional hex color; leave it empty for a neutral glass-pill style
Add quick-link buttons
Below the CTAs, build a grid of up to 8 quick-link buttons for things like a wine list, gift cards or an event page. Click Add button, choose an icon from the 24 available options, type a label (up to 18 characters) and an HTTPS URL, and optionally set a custom color. Use the up and down arrows to reorder buttons and the trash icon to delete one.
You can save up to 8 buttons, but the landing page displays the first 6 to keep the screen focused. Order your most important links first.
Turn on contact shortcuts
In the Contact actions section, toggle on any of the shortcuts you want diners to be able to tap. These put calling, messaging, navigation and your website one tap away.
| Shortcut | What it needs |
|---|---|
| Phone | Shows your location's phone number from Settings (read-only here) |
A WhatsApp number with country code (7 to 20 digits, e.g. 972 for Israel) | |
| Directions | A Google Maps or Waze link (HTTPS, or a waze:// deeplink) |
| Website | An HTTPS website URL (auto-fills from Settings when available) |
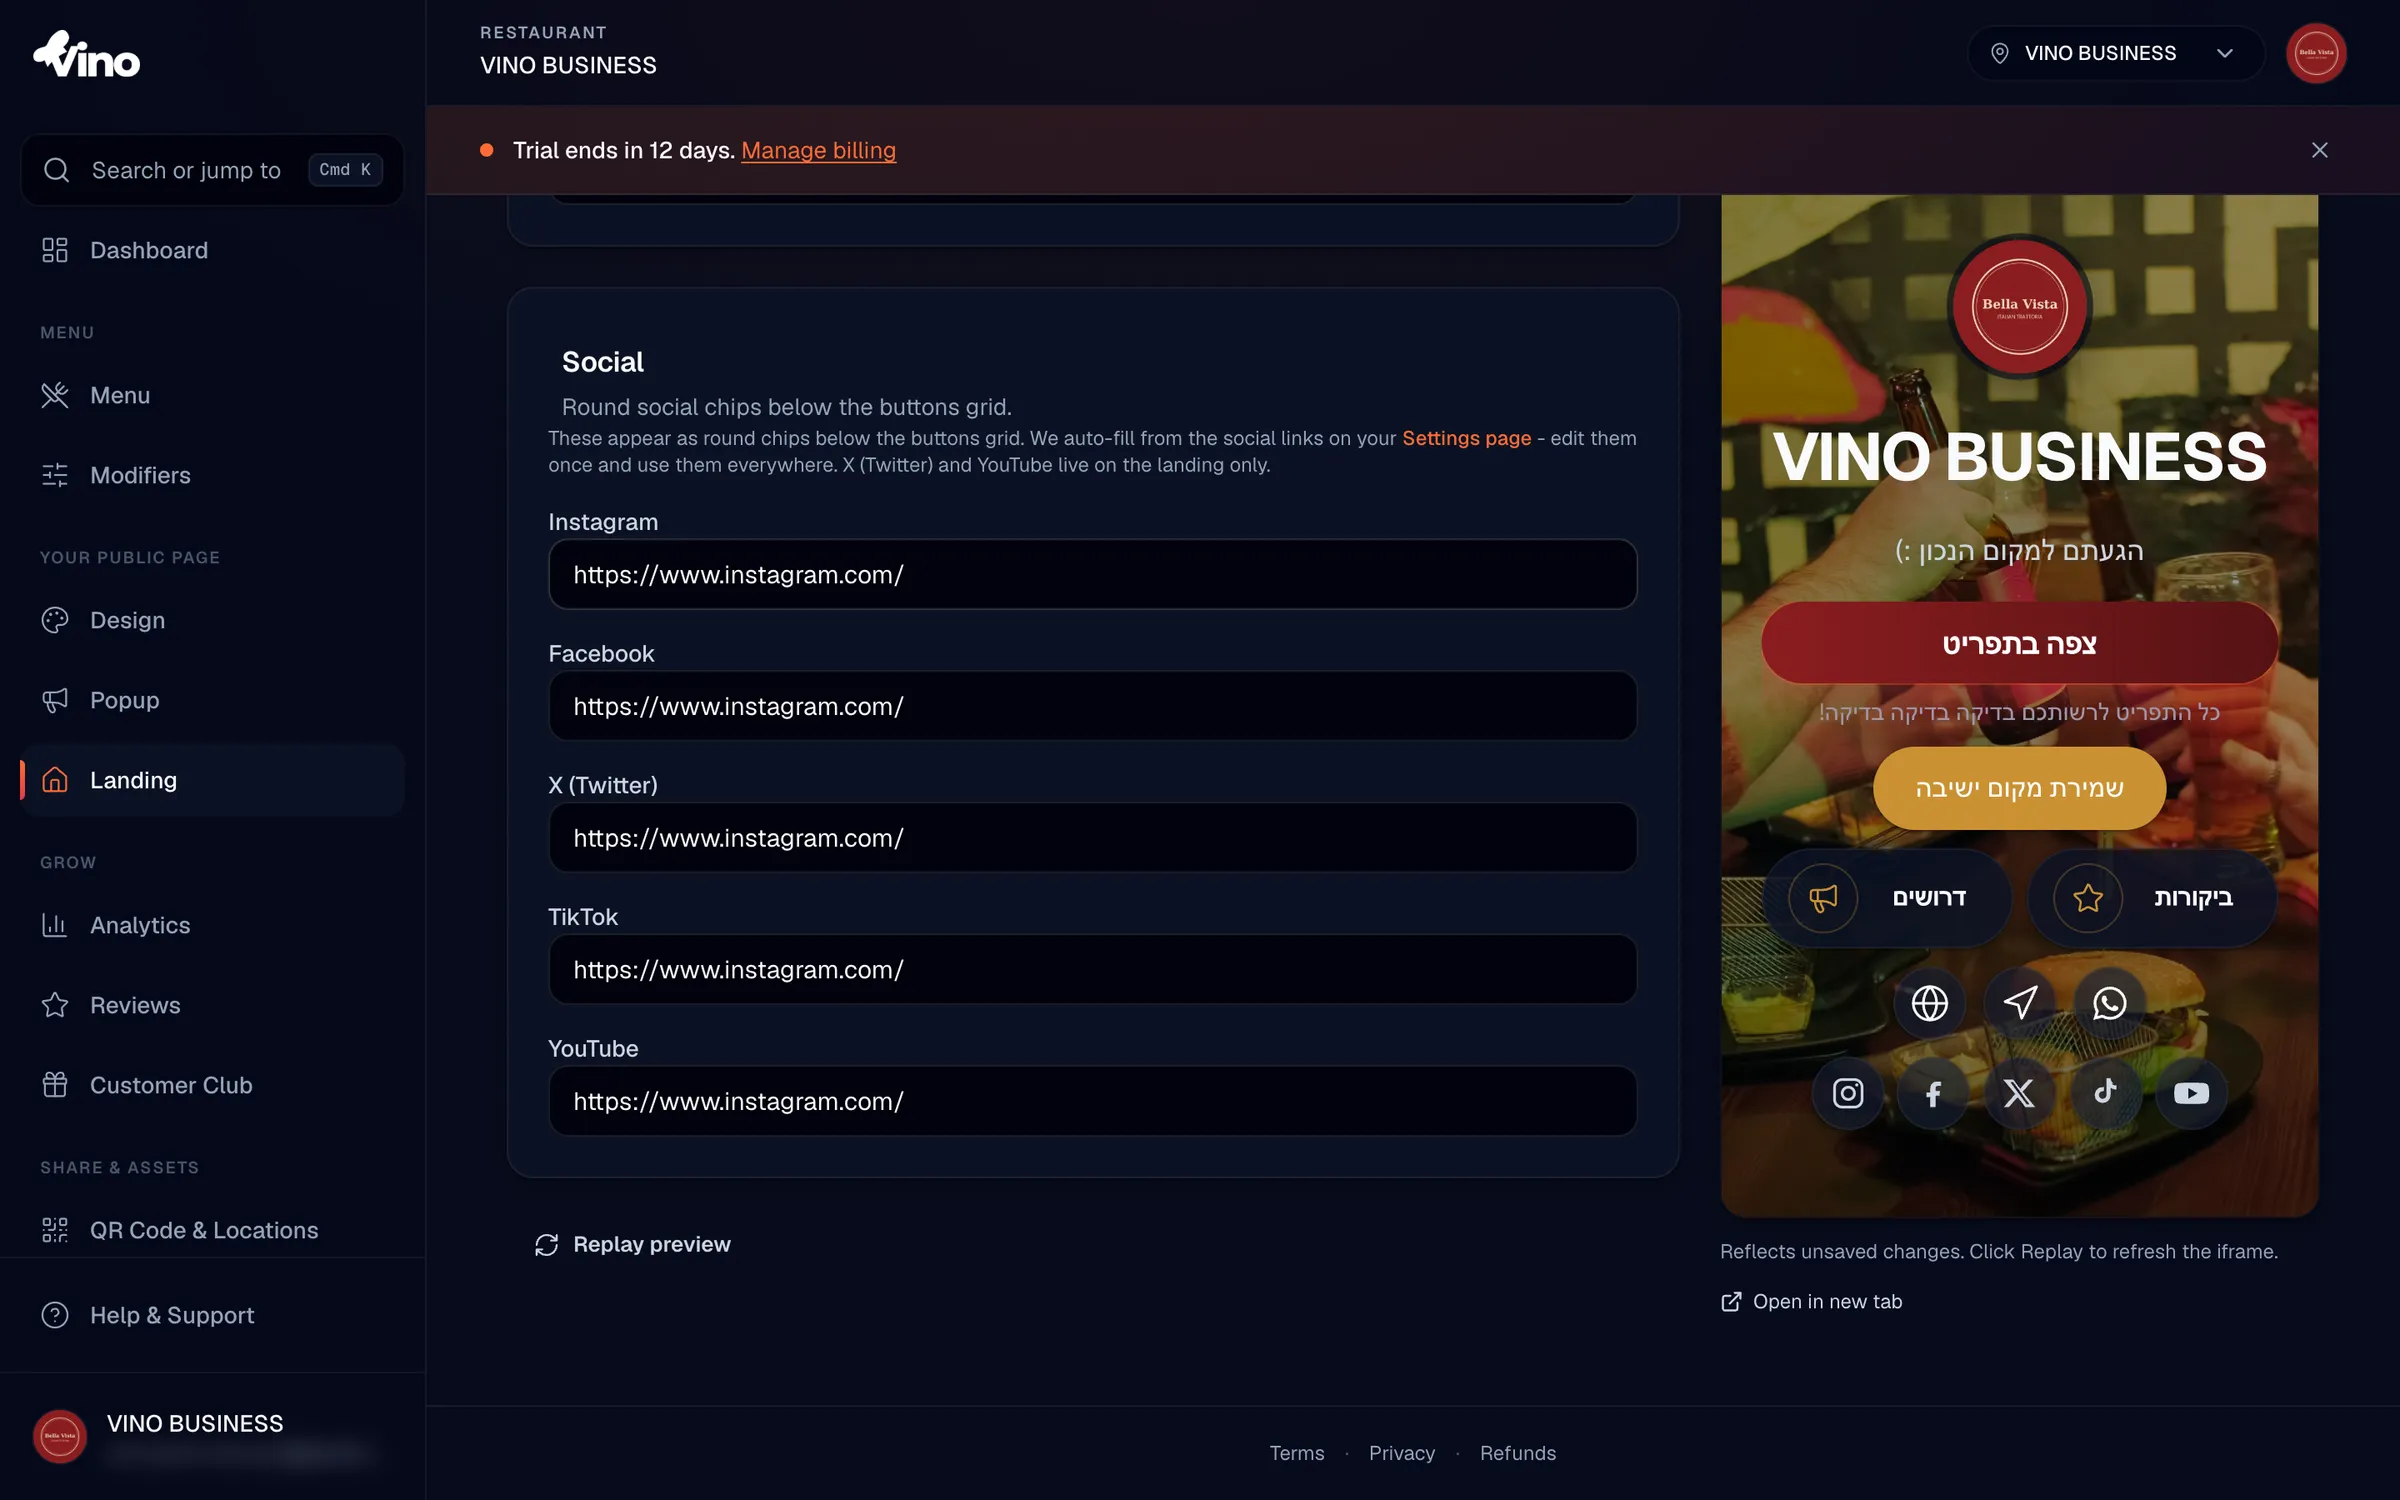
Add your social links
In the Social section, add links to your Instagram, Facebook, X/Twitter, TikTok and YouTube profiles, up to five in total. Where you have already saved these in your restaurant Settings, the fields auto-fill, and you can override any of them here. All five are optional, so add only the profiles you actively use.
Translate your text (multi-language menus)
If you run a multi-language menu, click the locale tabs above each translatable field, the hero title, tagline, CTA labels and subtitles, secondary button label and quick-link labels, and enter text for each enabled language. When you save, menus with two or more enabled languages auto-translate any fields you leave blank, so you can fill in your main language and let Vino handle the rest.
Preview and save
Check the live preview on the right at any time; it reflects your unsaved changes after a short delay. If it looks out of date, click Replay preview to refresh it right away. When you are happy, click Save landing to publish, then open /m/[slug] in a new tab to experience the landing exactly as a diner would.
Your landing lives at /m/[slug], separate from your menu at /m/[slug]/menu.
Still stuck? Email us at info@vino-smart.com and we will help you set up your landing page.
Was this helpful?