Tour your Vino dashboard
Find your way around the Vino dashboard: setup progress ring, live menu stats, quick actions, and the feature grid.
The dashboard is the main control center that appears right after you log in. It shows your menu setup progress, live statistics, quick shortcuts, and a grid of every feature, so everything you need to manage your menu is on one page.
Open your dashboard
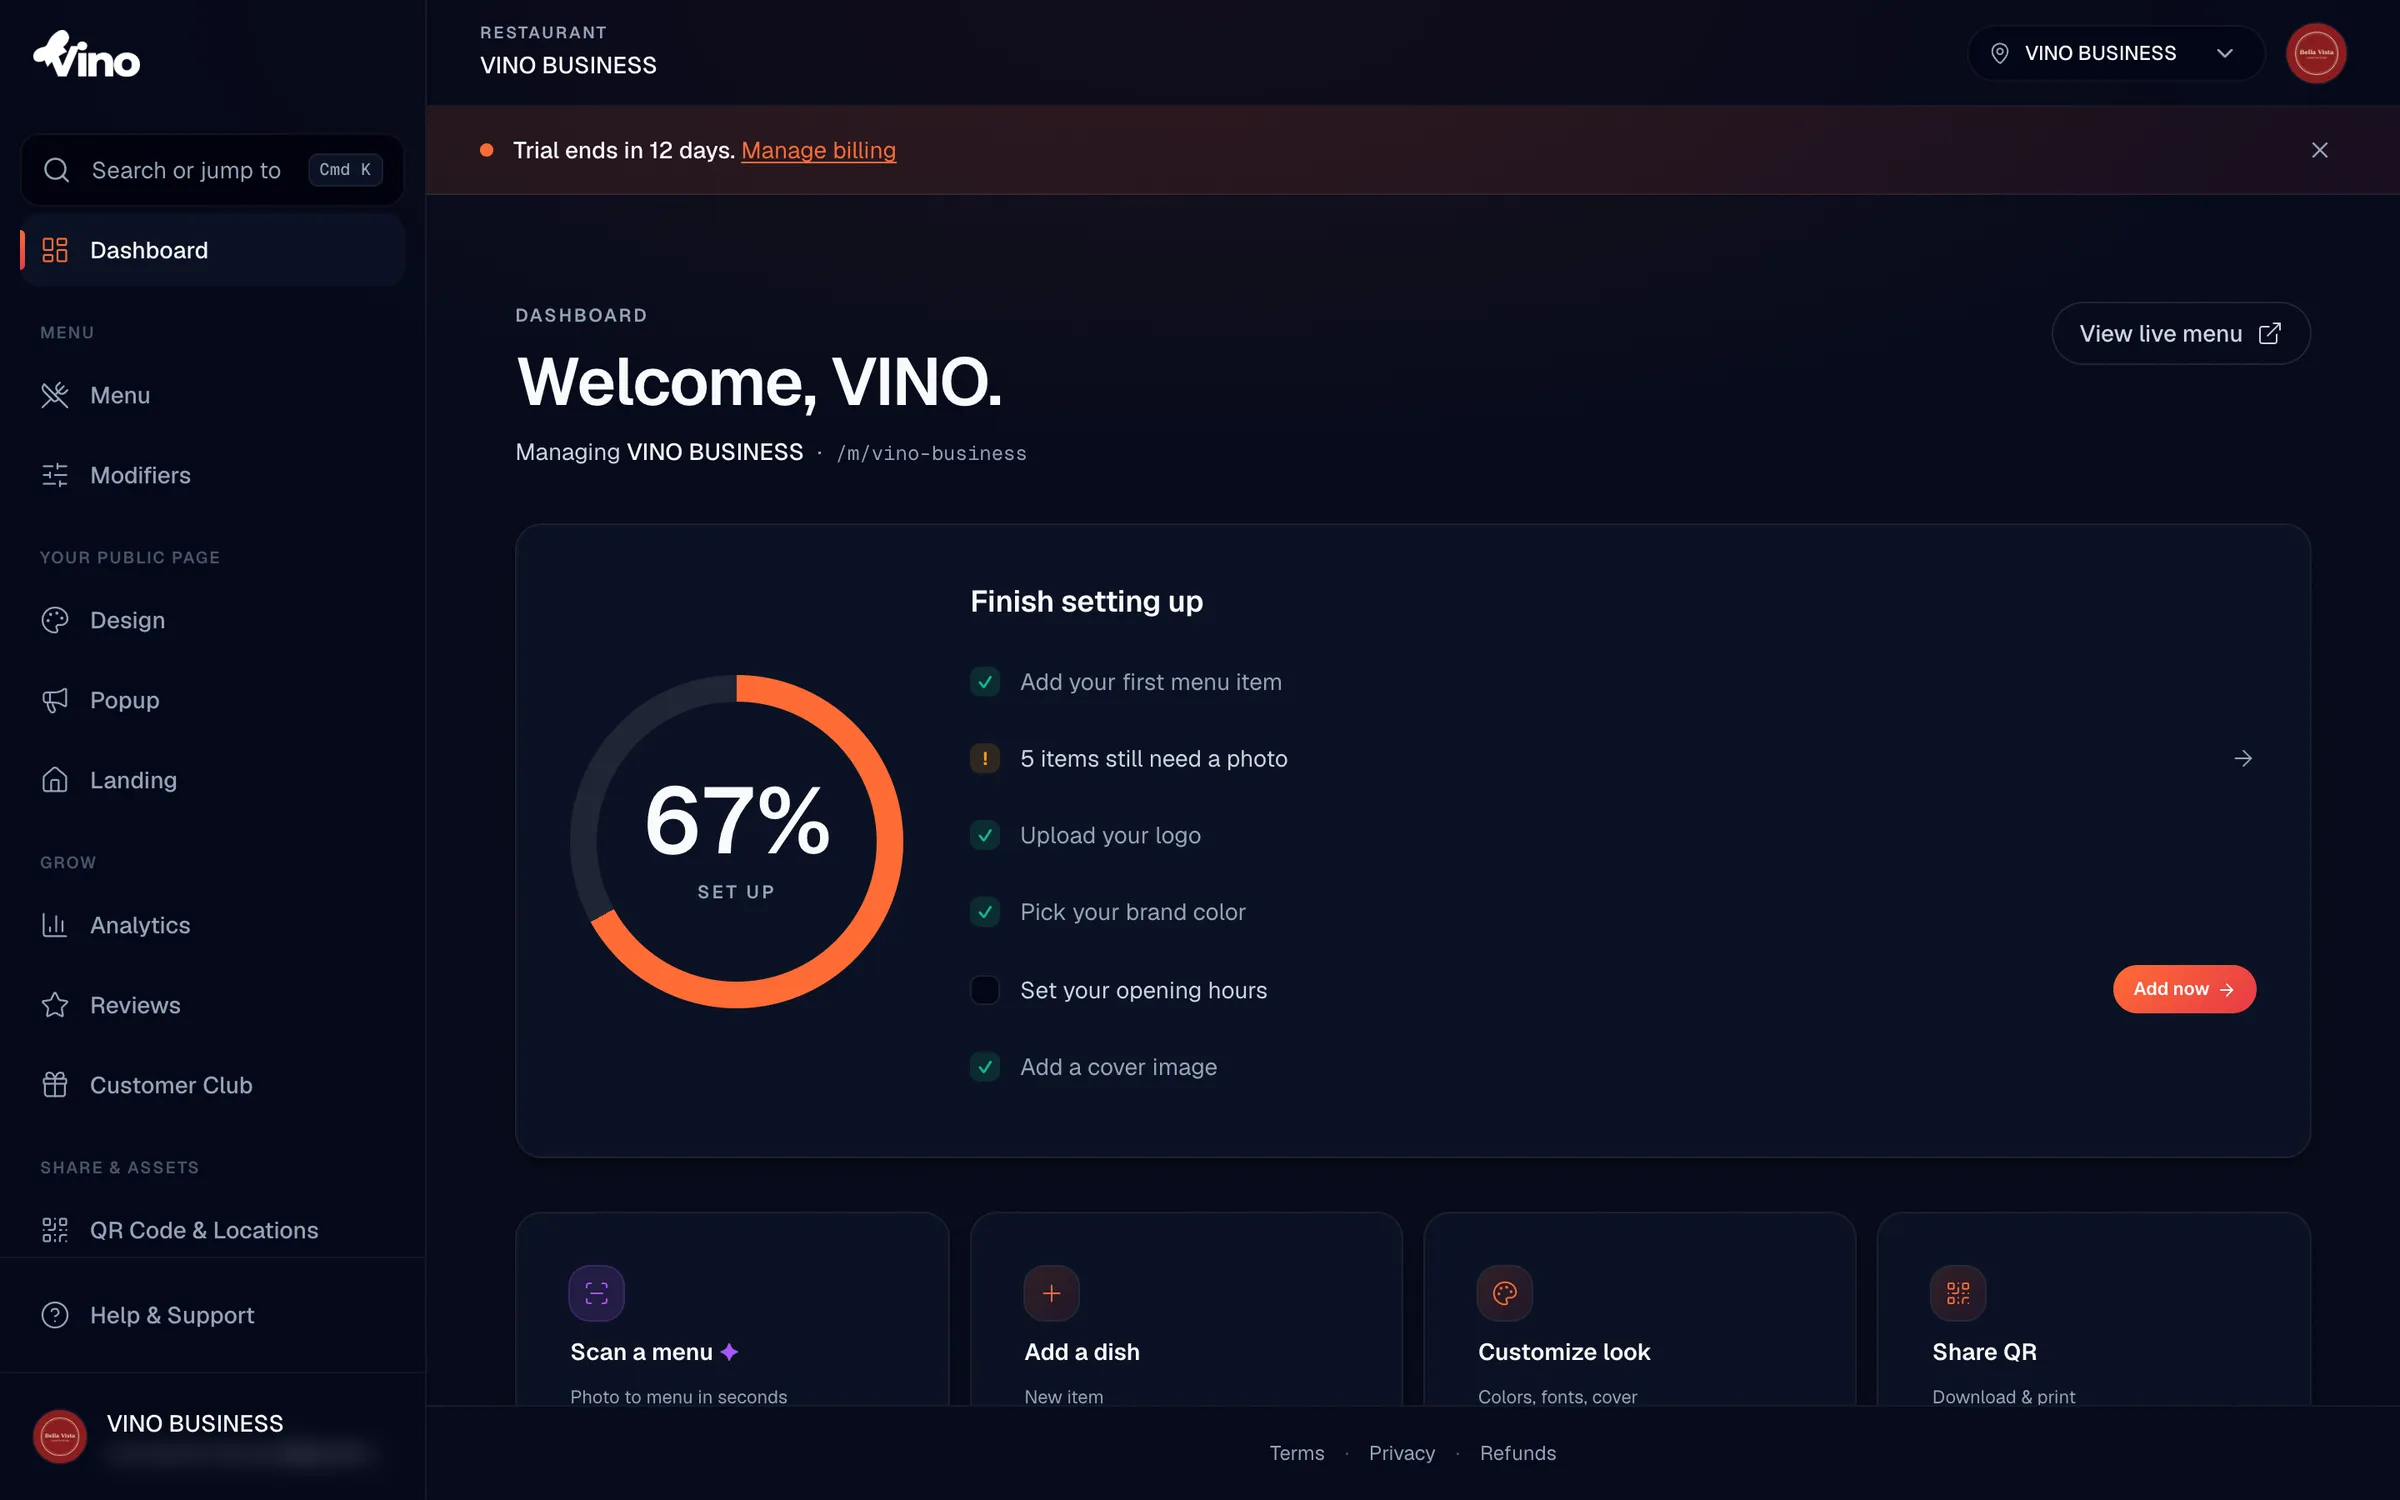
Log in to your restaurant dashboard at my.vino-smart.com/dashboard. This is the first page you see after signing in. At the top, the welcome header greets you by name and shows the restaurant you are managing, along with your public menu URL (for example, /m/your-restaurant-slug) and a button to view your live menu.
The public menu link in the header always points to your live, customer-facing menu. Open it any time to preview exactly what diners see.
Track your setup progress
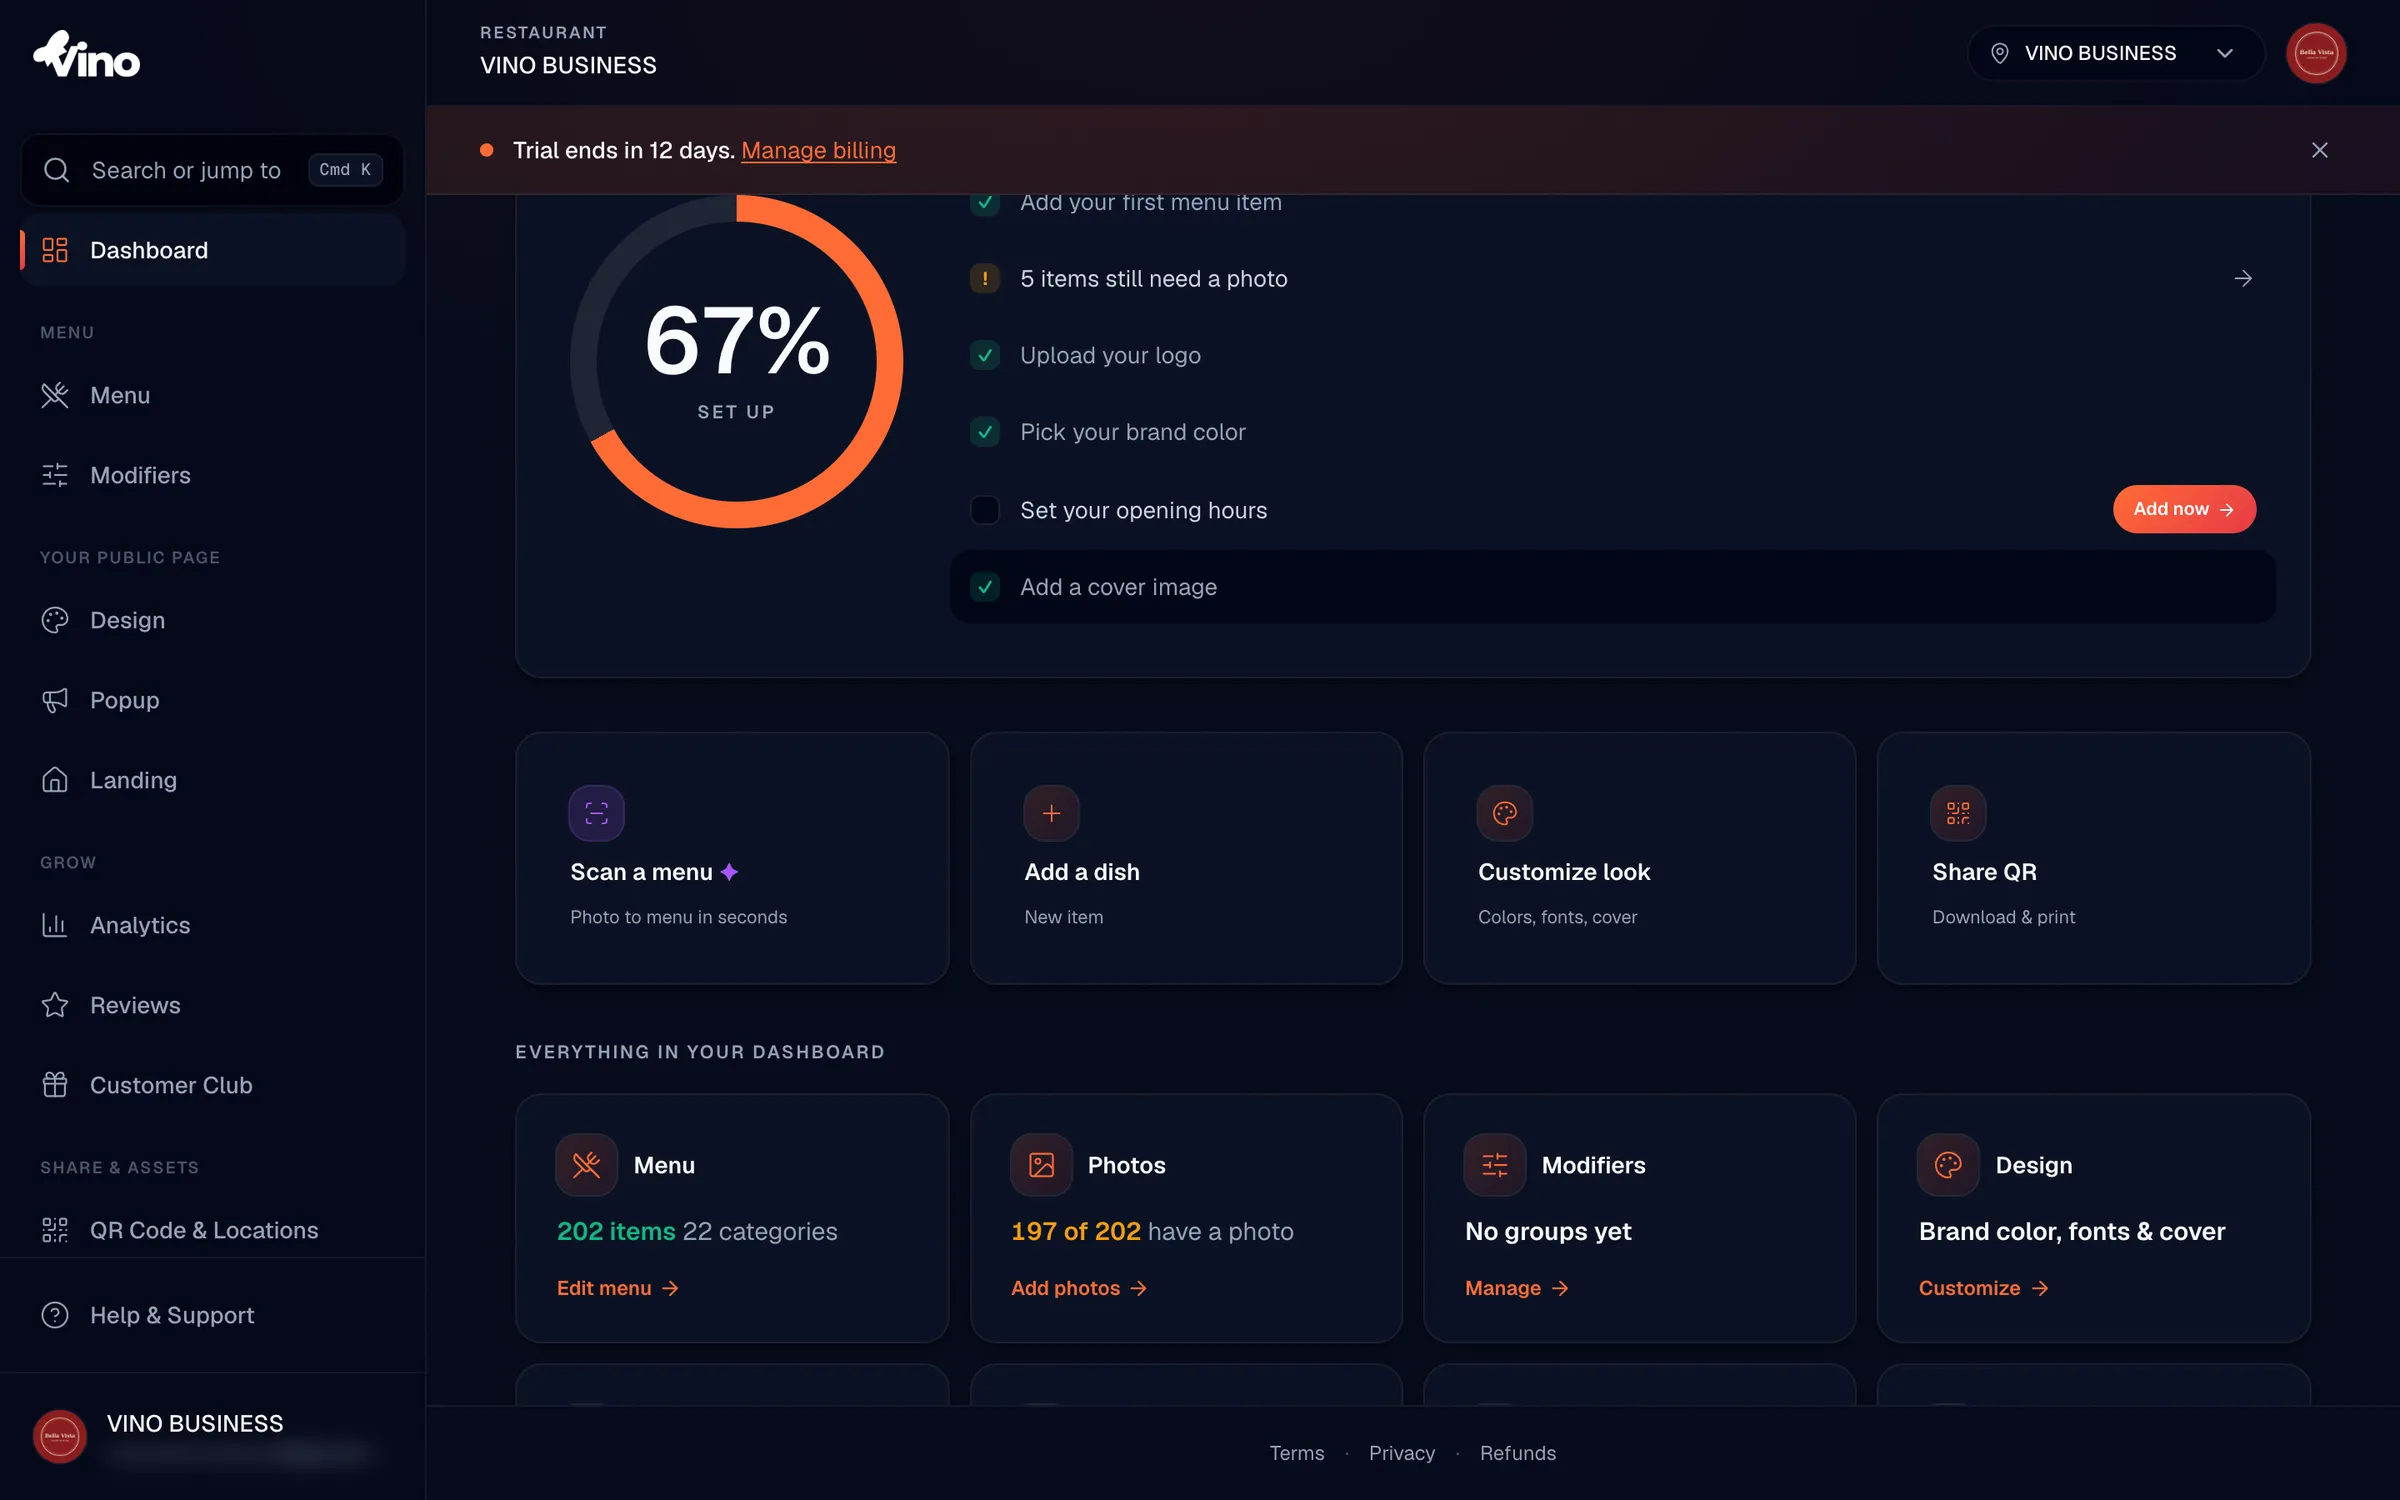
Look at the "Finish setting up" section near the top. If your menu is fully configured, you'll see a success message confirming "Your menu is live." Otherwise, a circular progress ring shows how far along your setup is, alongside a checklist of what's left to do. The ring fills toward 100% as you complete each task and animates as it counts up.
The progress is based on six setup tasks:
- Menu items
- Photos
- Logo
- Brand color
- Business hours
- Cover image
Use the setup checklist
The checklist on the right of the progress section is the fastest way to finish onboarding. Each task shows its status, and the first incomplete task is highlighted with an "Add now" button that takes you straight there. Work down the list until everything is done.
Each task uses one of three status indicators:
| Indicator | Meaning |
|---|---|
| Checkmark | The task is fully complete |
| Exclamation mark | The task needs attention (for example, some items still have no photo) |
| Empty circle | The task hasn't been started yet |
A warning (exclamation) status means setup can keep moving, but the completion ring only reaches 100% once every step is fully done.
Run a quick action
Below the setup section, four quick action tiles cover the most common tasks. Click any tile to jump straight into that workflow without hunting through menus.
- Scan a menu - turn a photo of an existing menu into a digital one with AI
- Add a dish - create a new menu item
- Customize look - open design settings for your menu
- Share QR - download QR codes to print and place on tables
Explore the feature grid
Scroll down to "Everything in your dashboard" to see nine cards, one for each major feature. Each card shows a live snapshot of that area and links to its full section. Click any card to open it.
- Menu - total item and category count, with an "Edit menu" action
- Photos - how many items have photos versus your total; green when all items have a photo, orange if some are missing
- Modifiers - number of modifier groups (or "0 items yet" if you haven't created any)
- Design - your brand color, fonts, and cover image
- Popup - promotional popups
- Landing page - your standalone landing page
- QR & links - shows "Live" with your public menu path
- Languages - number of enabled languages plus auto-translate status
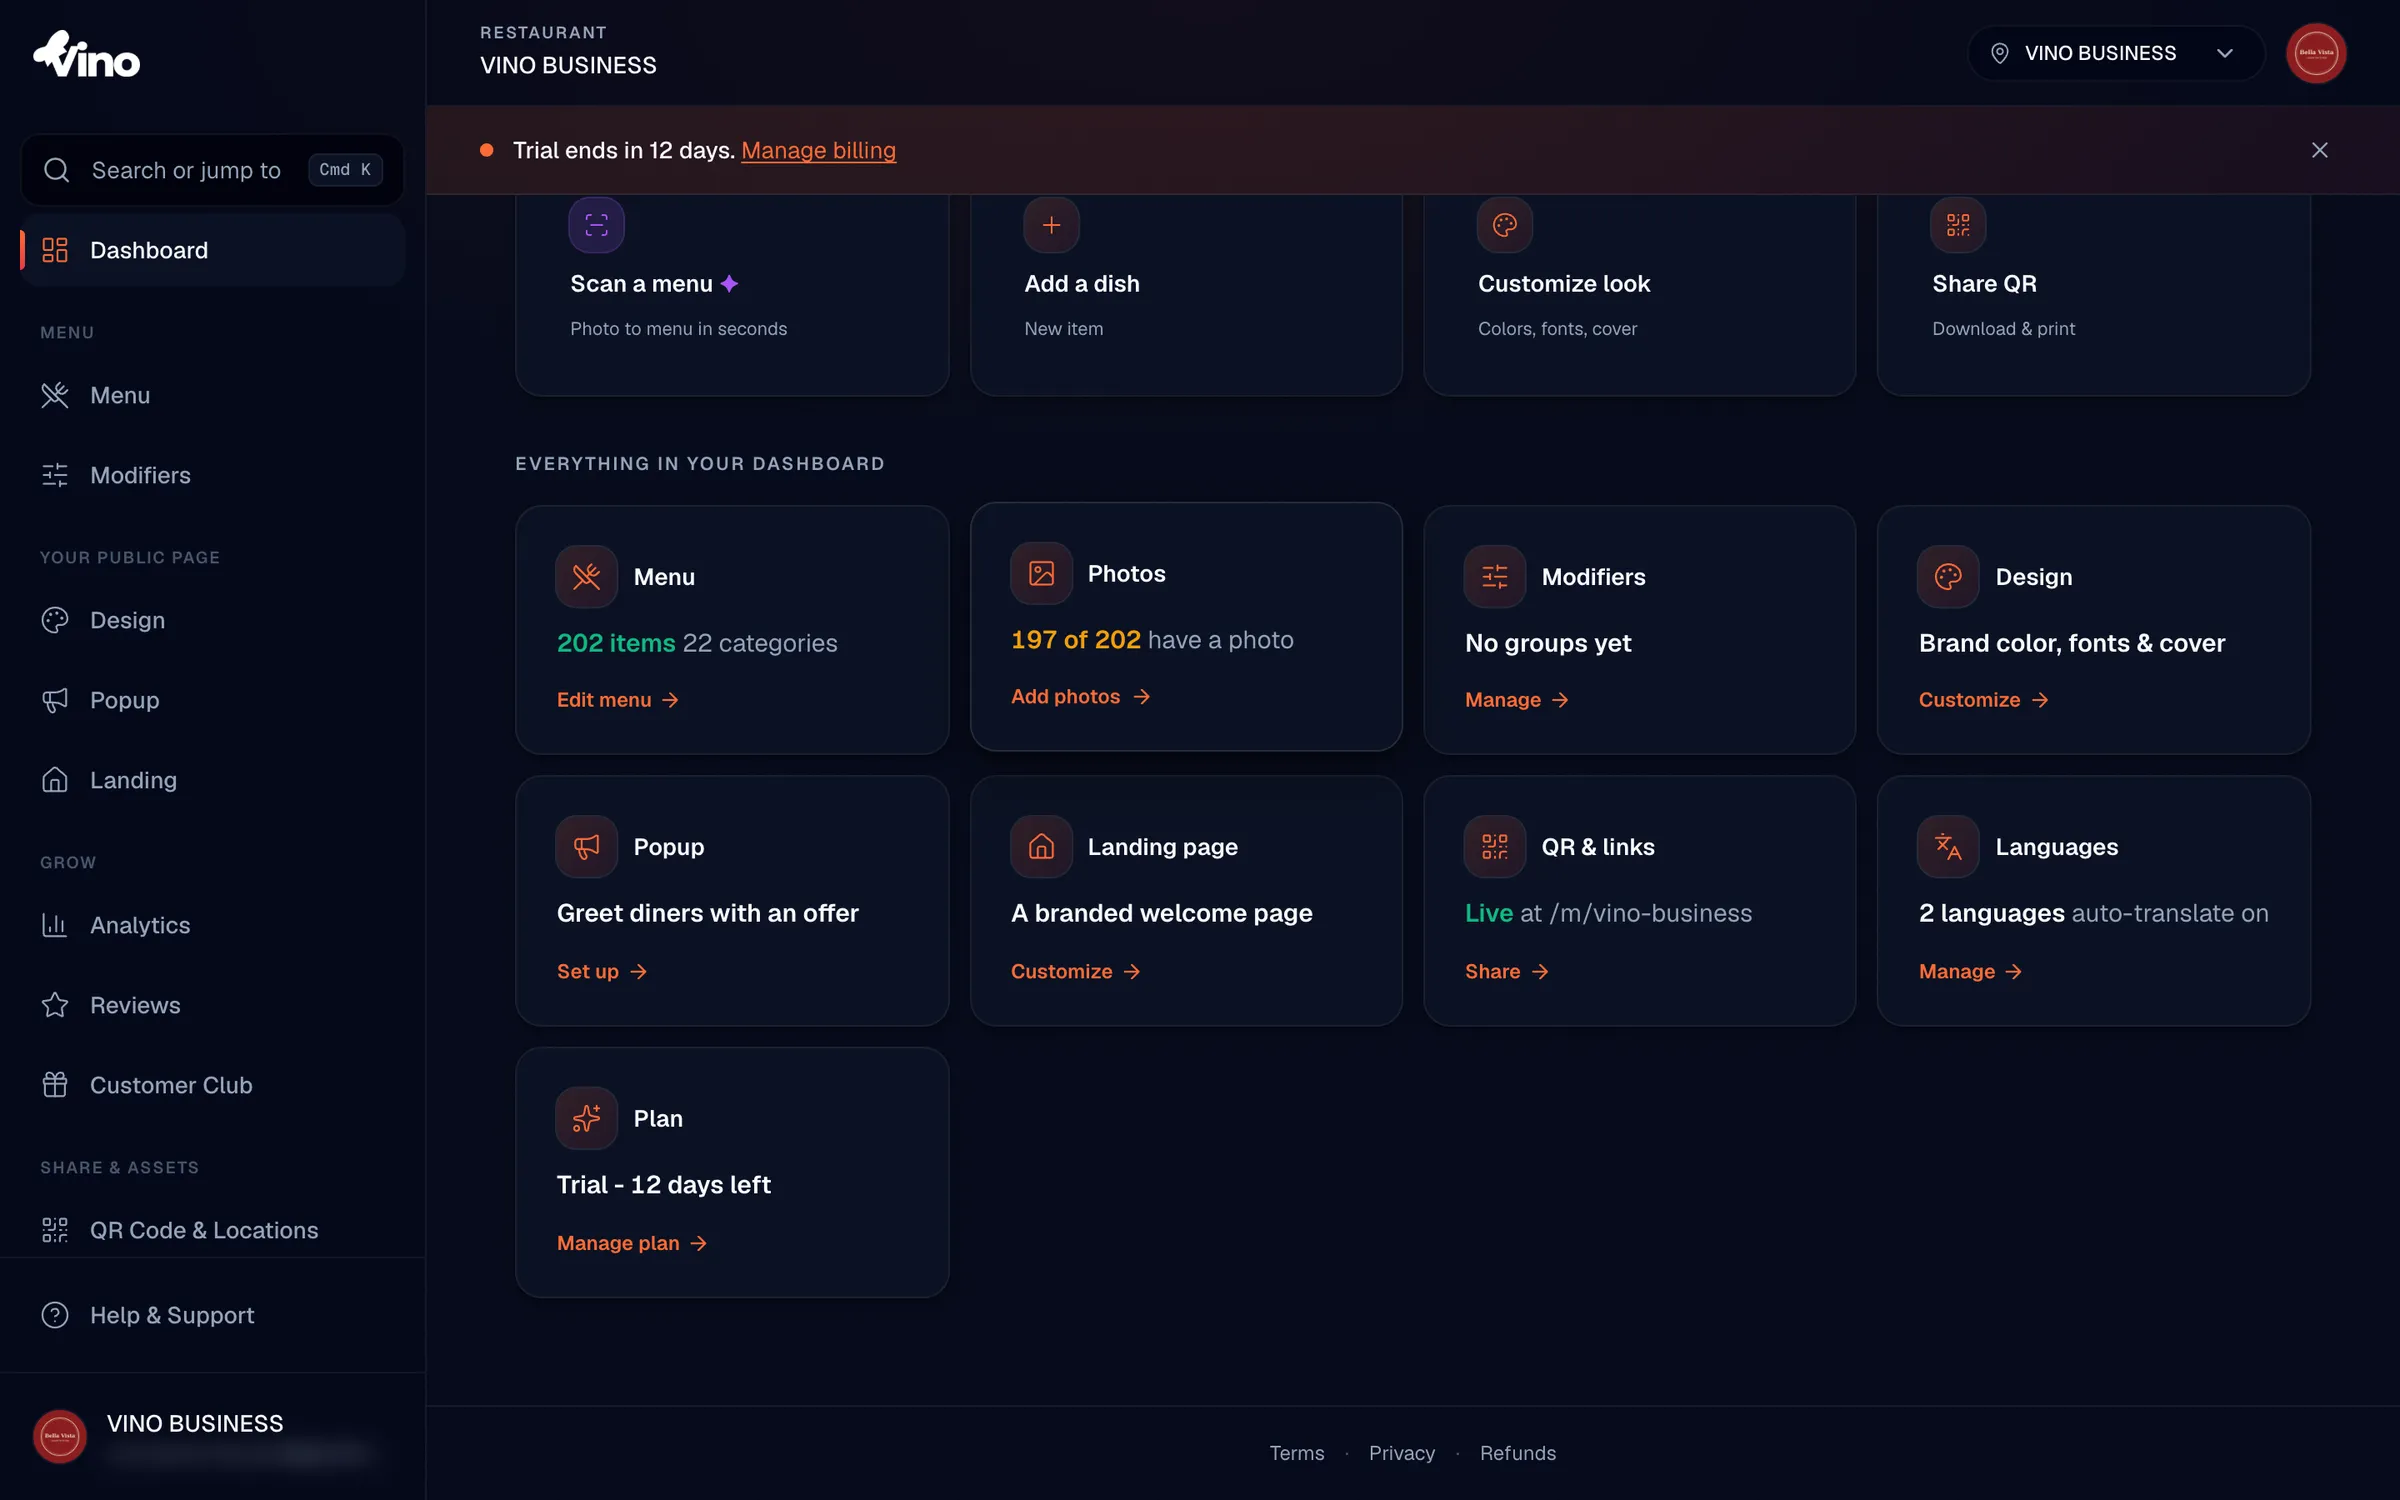
These statistics are loaded when the page renders, so they reflect your menu at that moment rather than updating in real time. Refresh the page to see the latest counts.
Still stuck? Email info@vino-smart.com and our team will help you get oriented.
Was this helpful?