Set up your menu with the onboarding wizard
Use the 3-step setup wizard to brand your menu, add your first items, and go live with a scannable QR code in minutes.
When you finish signing up, Vino drops you into a three-step onboarding wizard that takes your restaurant from a blank account to a live, scannable menu in minutes. The wizard walks you through branding your menu, adding your first items, and generating a QR code, all without leaving the flow or touching the main dashboard.
Start at the Welcome screen
Right after you sign up, you land on the Welcome screen, which opens the wizard at Step 1 (Profile). A progress bar at the top shows you where you are in the three-step flow. You can move forward at your own pace, skip any step, and come back to finish later from the dashboard. If you ever want to exit early, click Skip onboarding in the top-right of the header to jump straight to the dashboard.
Already finished onboarding and want to run through it again? Visit /welcome?welcome=true to replay the flow and reconfigure your profile or practice the steps.
Step 1: Set up your profile (logo and brand color)
On the Profile step you set the visual identity of your menu. Click the dropzone to upload your restaurant's logo, or skip this if you do not have one ready yet. Once a logo is uploaded, Vino automatically extracts color suggestions from it so your brand color matches your logo. Pick a brand color from the suggested swatches, choose one of the curated presets, or open the custom color picker for any hex color you like. A live preview of your menu updates on the right as you make changes, so you can see the result instantly. Click Continue when you are happy, or Skip to set up your profile later.
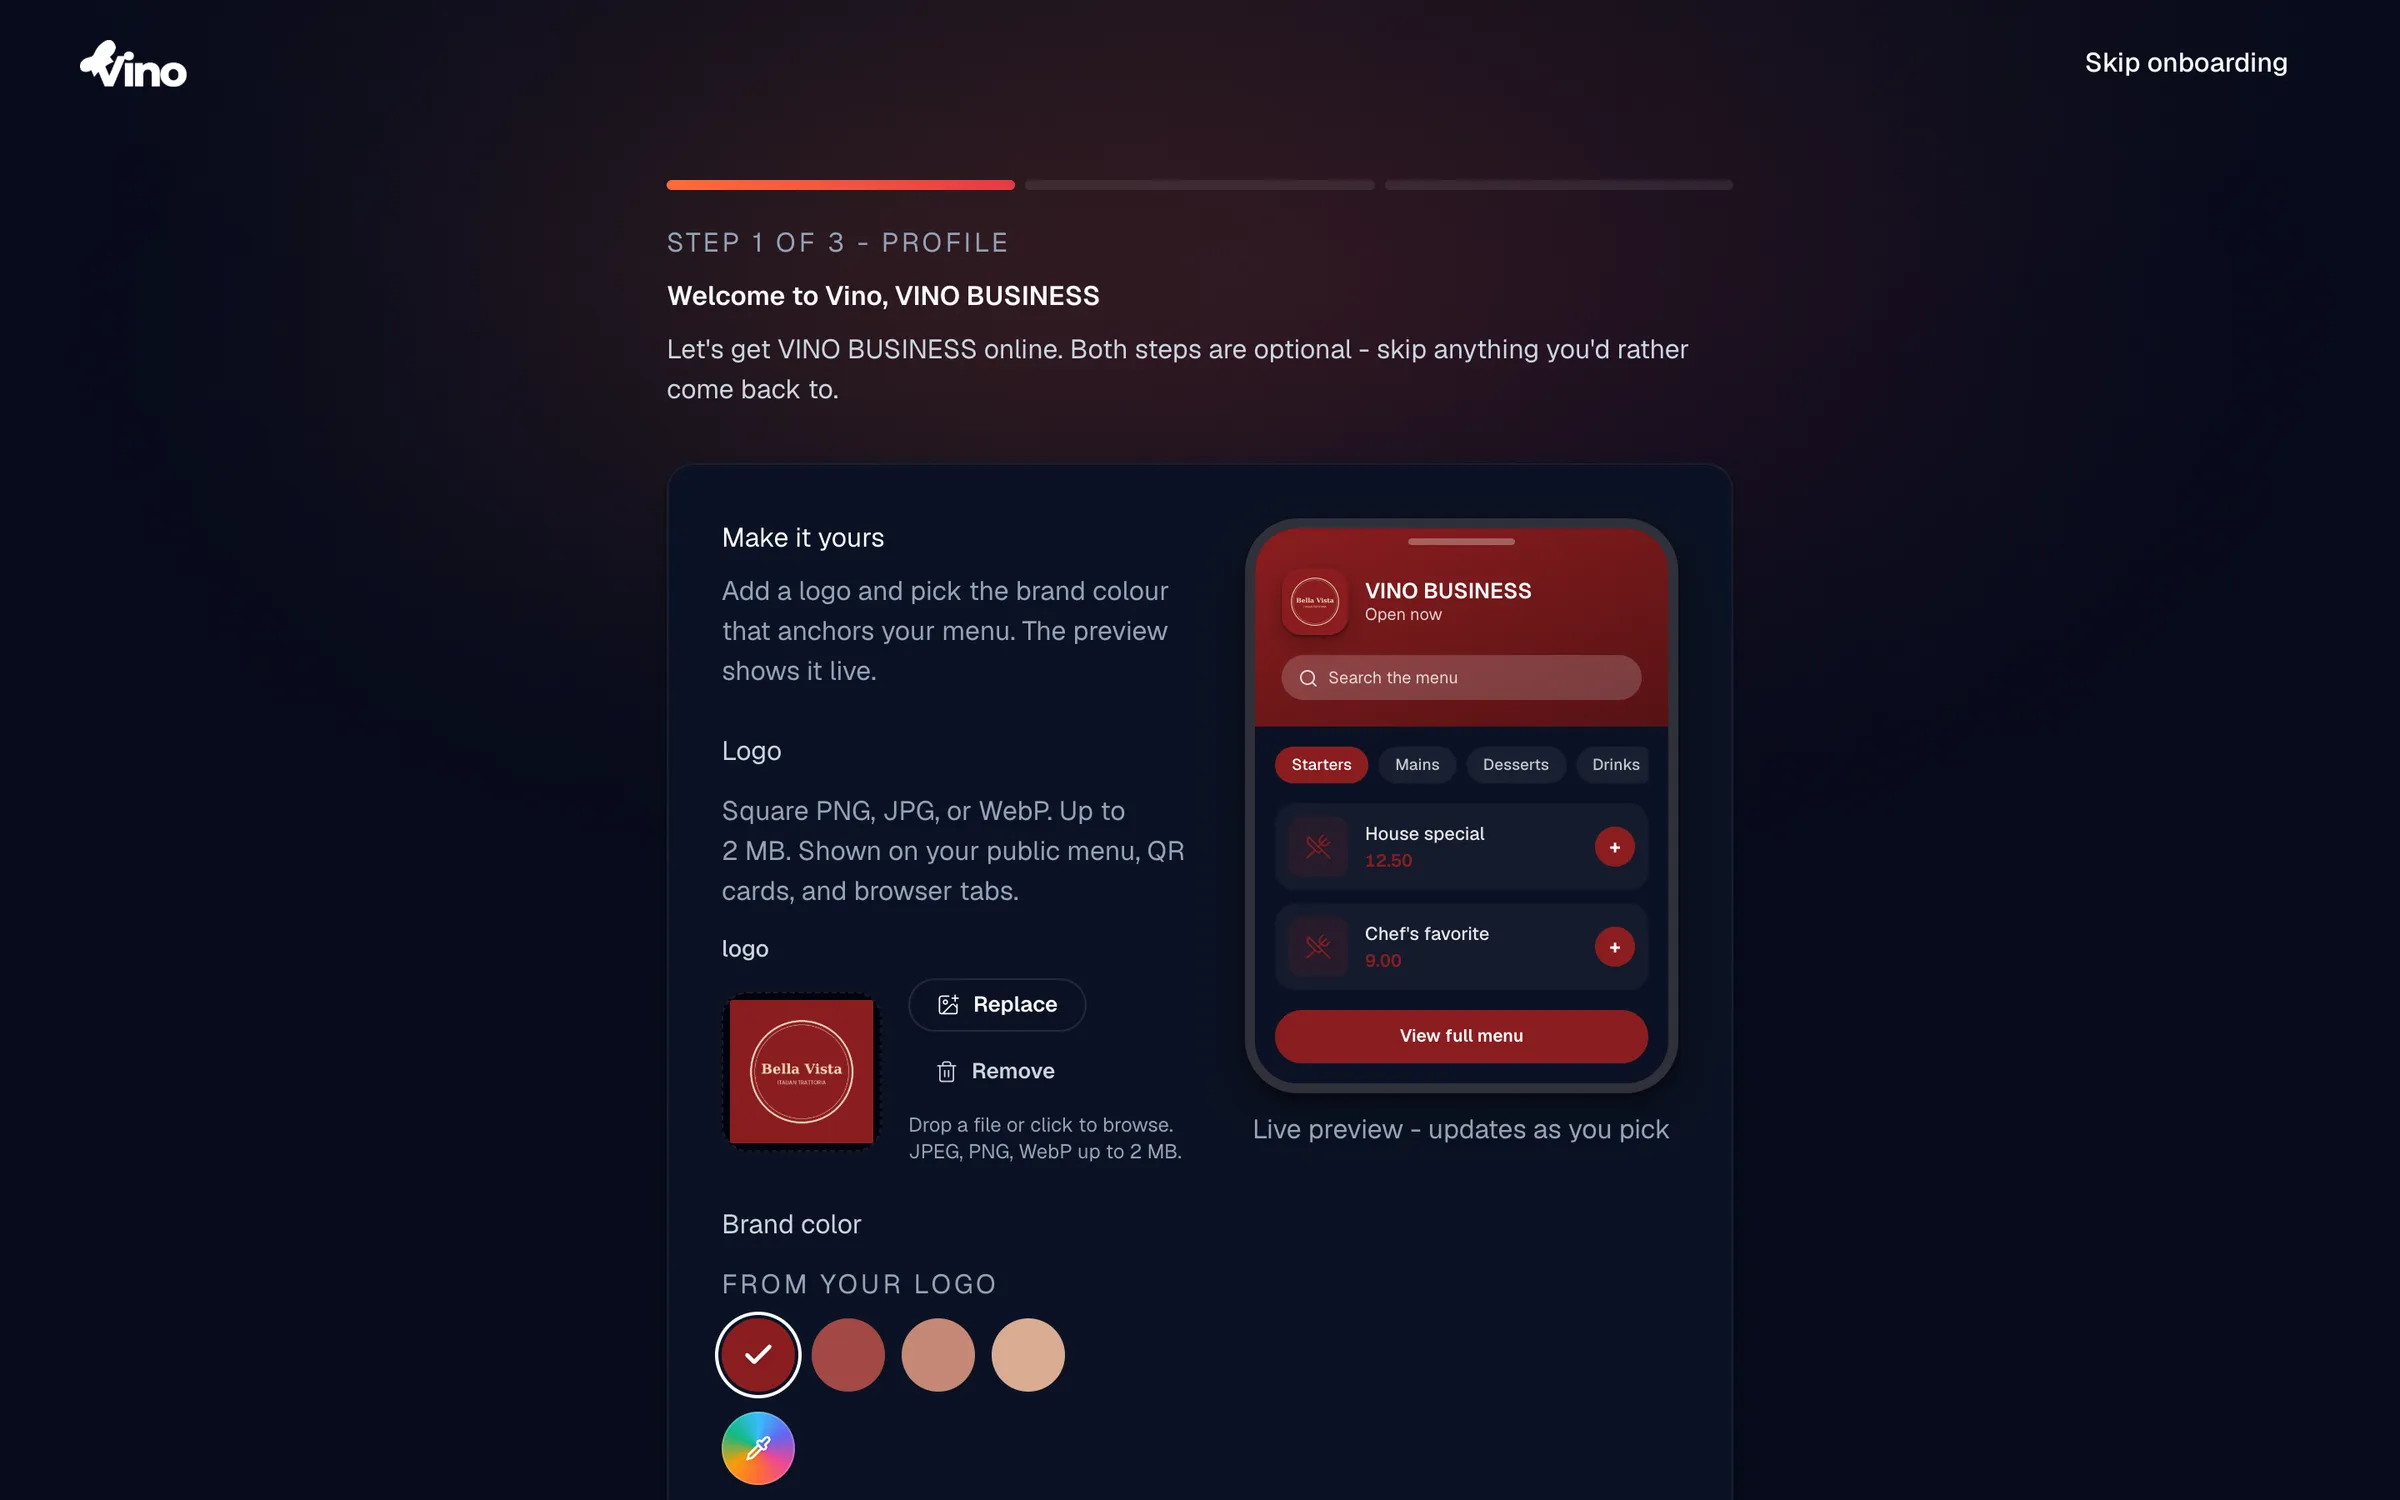
Your profile options:
| Option | Required | Details |
|---|---|---|
| Logo upload | Optional | PNG, JPG, or WebP, up to 2 MB, square aspect ratio. Shows on your public menu, QR codes, and browser tabs. |
| Brand color | Optional | Choose from 5 presets (Vino Orange, Forest, Royal Blue, Terracotta, Midnight), pick a color extracted from your logo, or use the native color picker for a custom hex. |
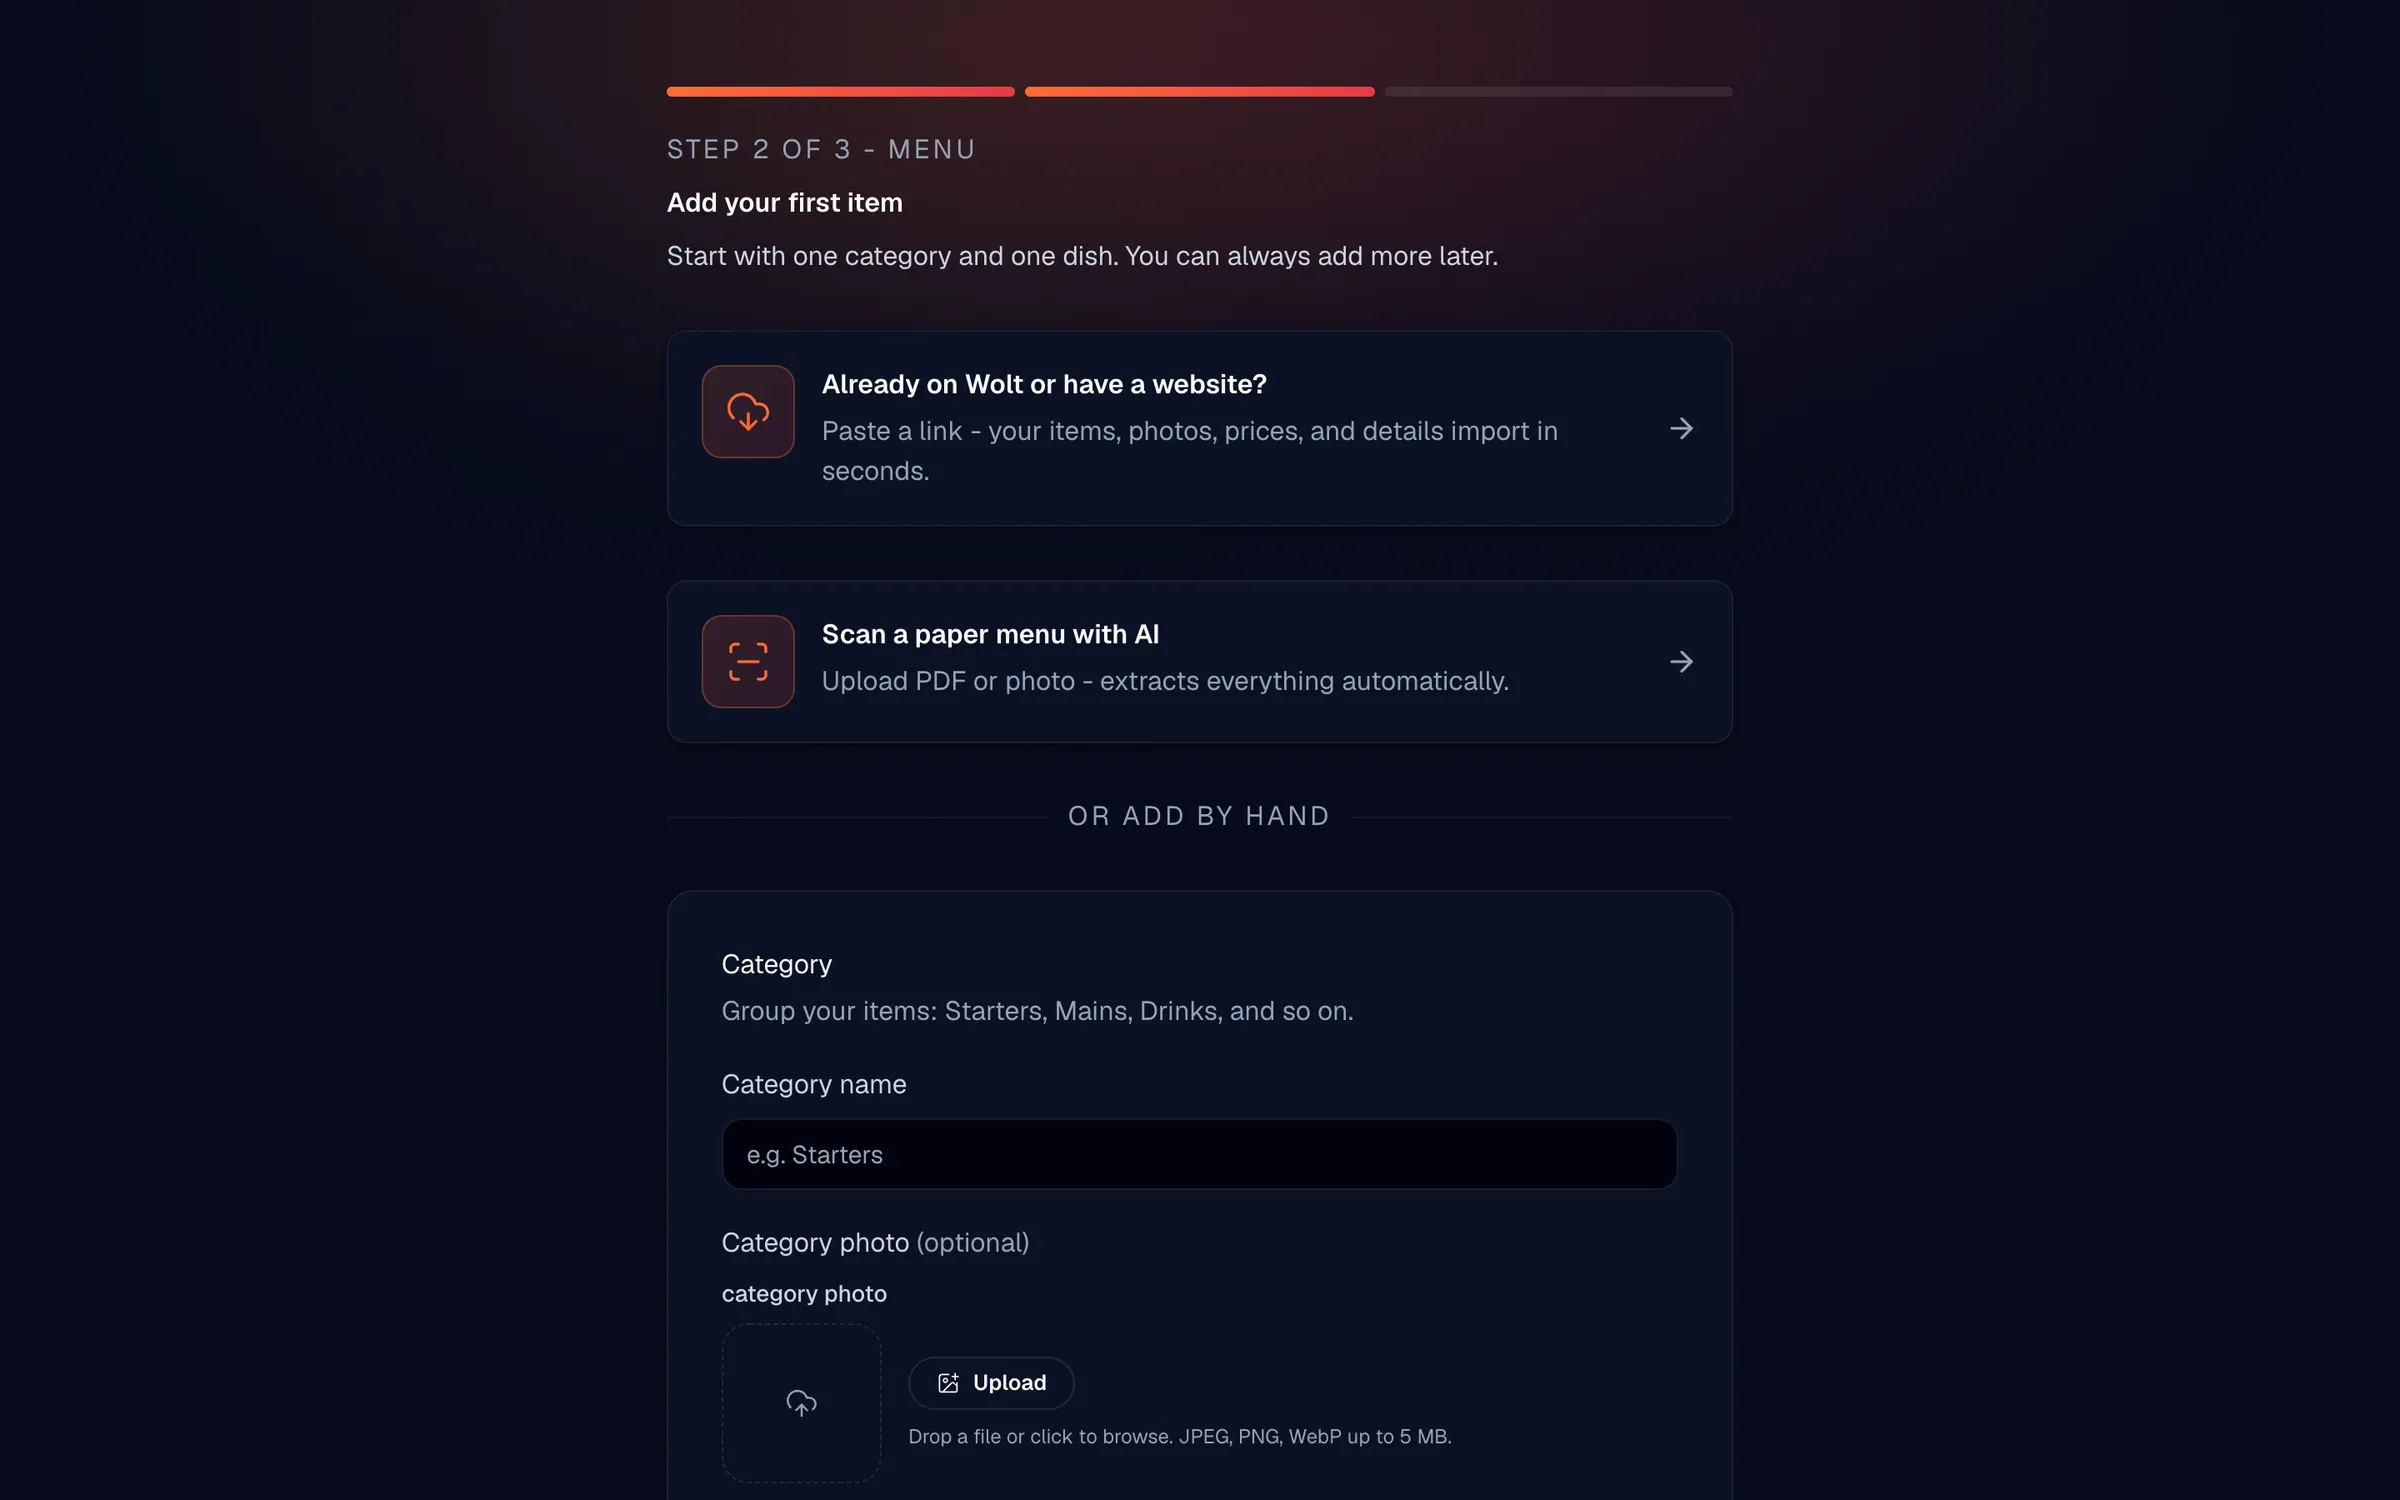
Step 2: Build your menu
On the Menu step you populate your menu, and you have three ways to do it. Pick whichever is fastest for you:
- Import from Wolt or a website: Paste a link and Vino imports your items and photos in seconds. This is the quickest way to get a full menu in place.
- Scan a paper menu with AI: Upload a photo or PDF of your printed menu and AI extracts the items for you. The scan runs inline (upload, extract, review, apply) without leaving onboarding.
- Add items by hand: Name your first category (for example, "Starters"), optionally add a category photo, then add at least one dish.
For hand-entry, enter the dish name and price (both required) and an optional description. You can enhance the dish photo with AI to improve its lighting, color, and detail. Click Add item & continue when you are ready, or Skip to move on without adding items.
Your item options:
| Field | Required | Details |
|---|---|---|
| Category name | Required | Text, up to 120 characters. Groups related menu items. |
| Category photo | Optional | Image for the category card on your public menu. |
| Item name | Required | Text, up to 120 characters. |
| Item description | Optional | Text, up to 500 characters. |
| Item price | Required | Numeric in your local currency. Accepts 12, 12.5, or 12.50. |
| Item photo | Optional | Image upload; can be AI-enhanced. |
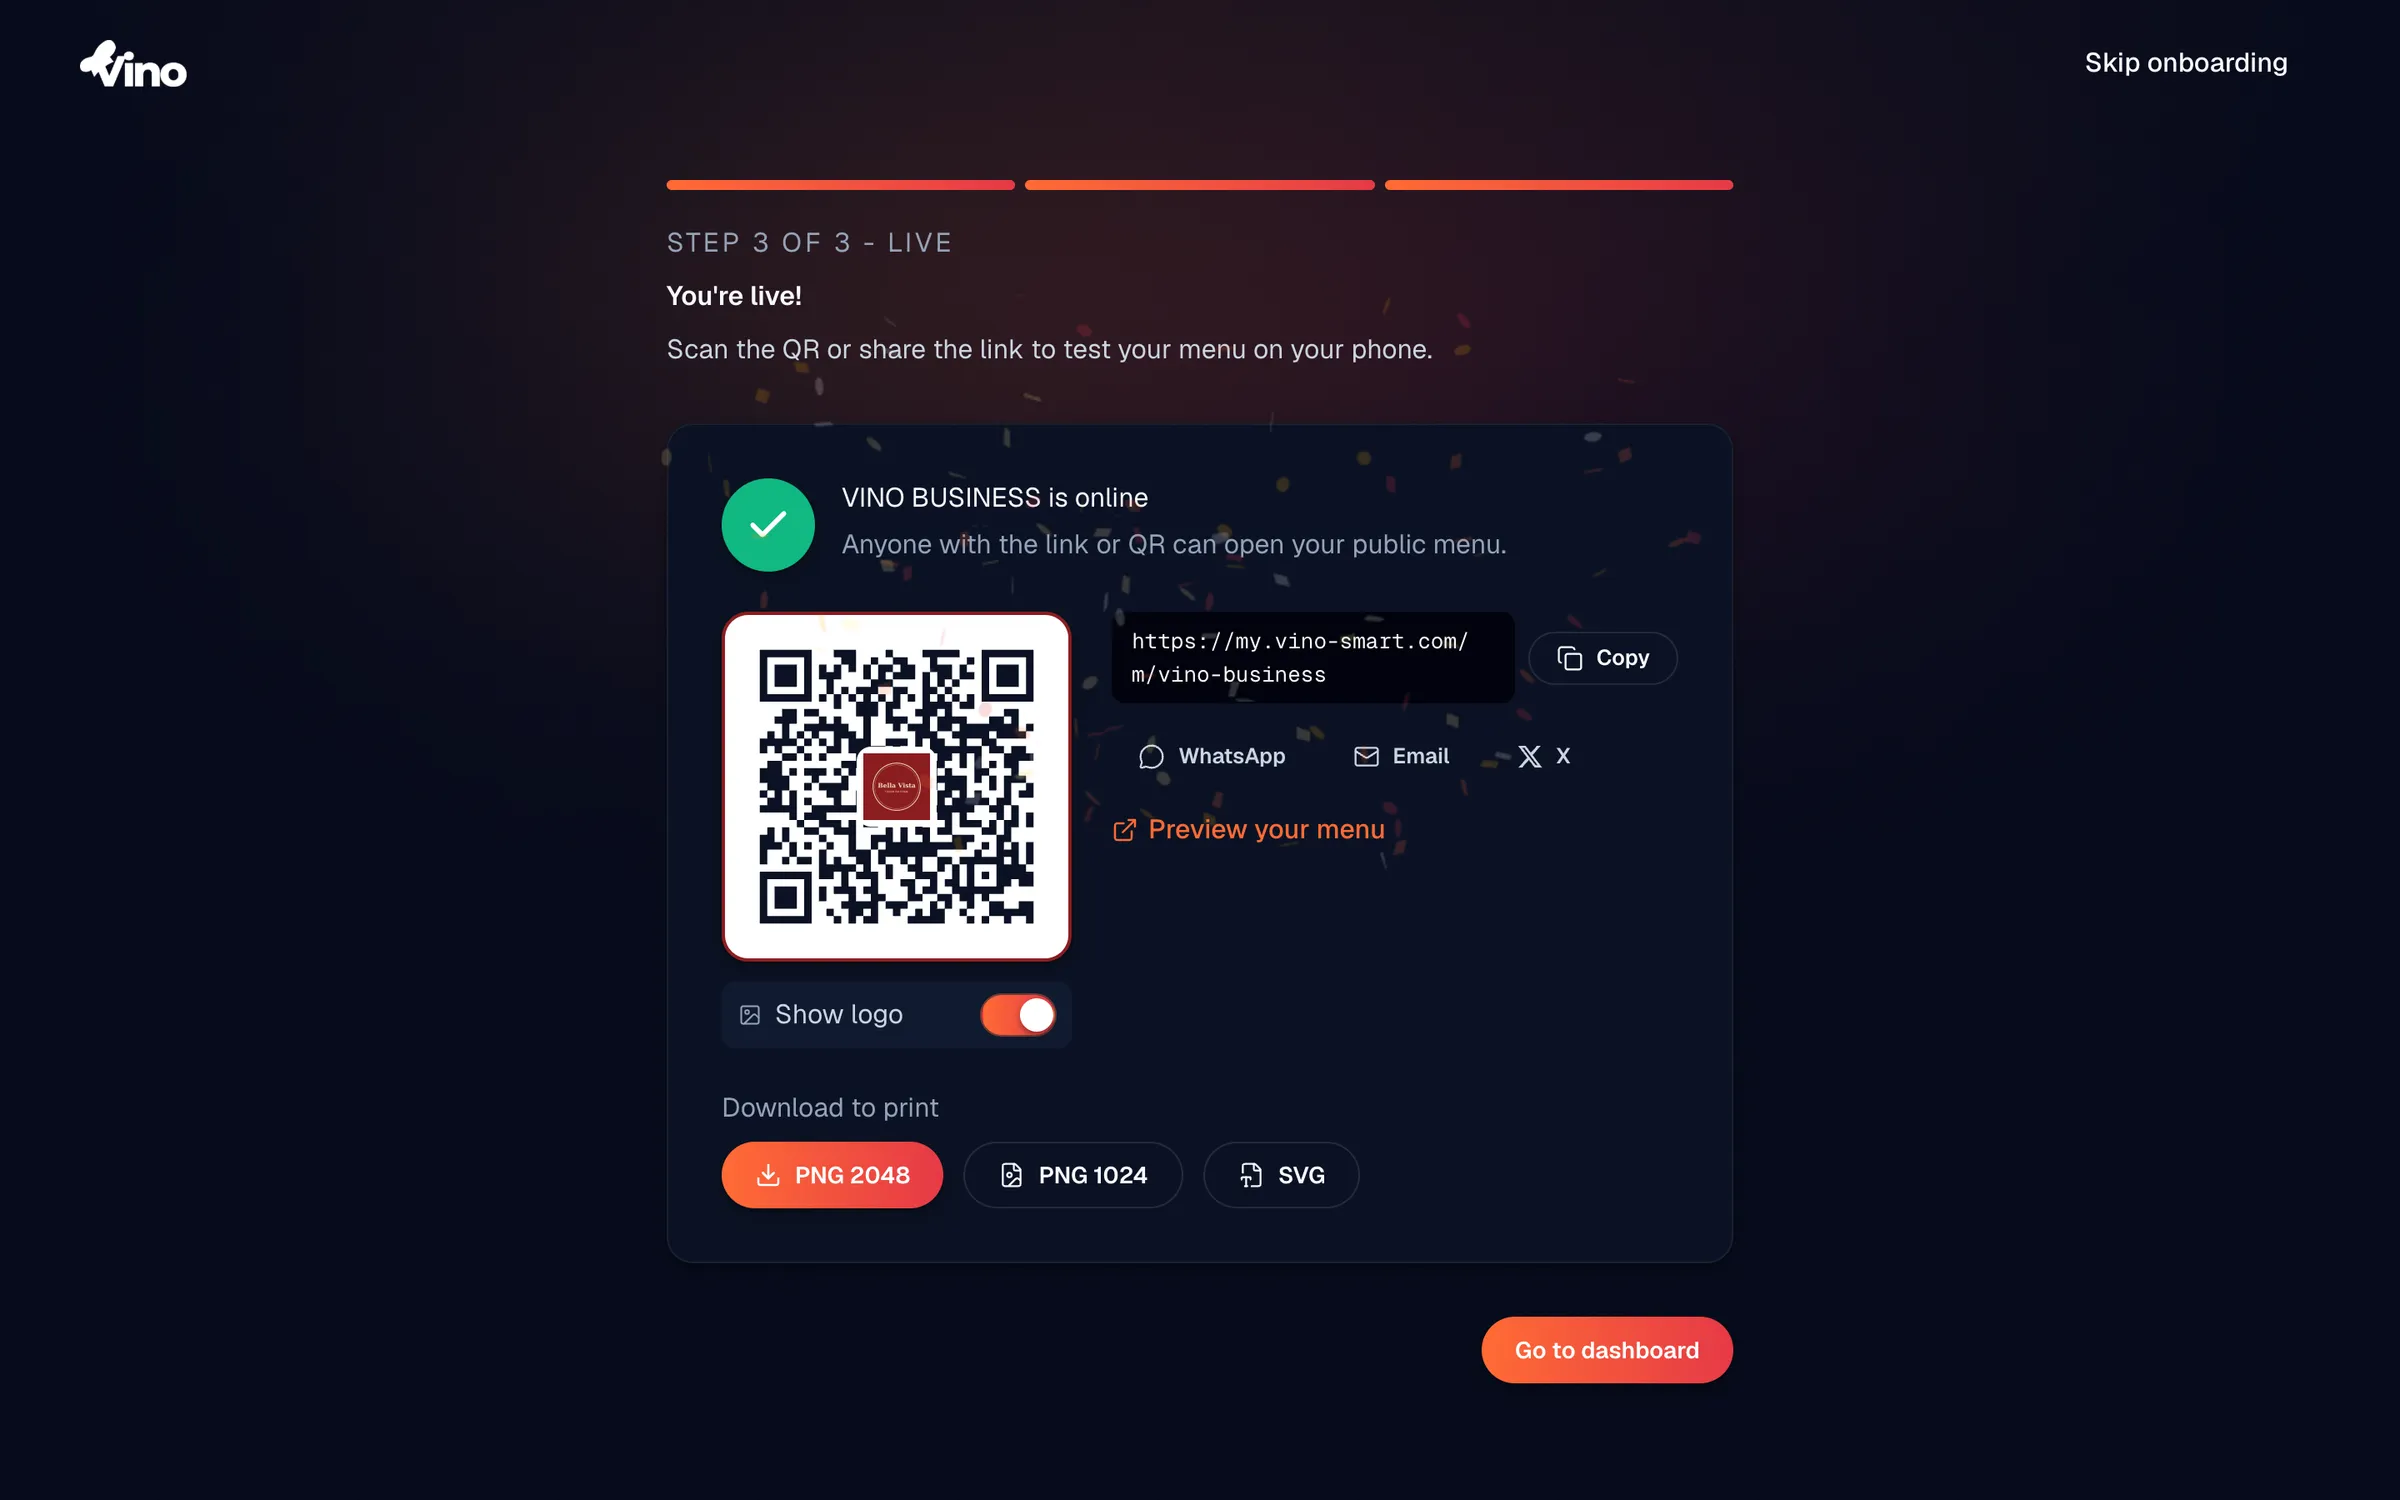
Step 3: Go live with your QR code
The final step gets your menu in front of diners. If you added items, you will see a "You're live!" screen with a generated QR code, your public menu URL, share buttons for Email, WhatsApp, and X, and a "Preview your menu" link so you can scan and test it on your phone. Toggle Show logo to preview the QR code with your restaurant logo embedded in the center, and, where your location supports it, download the code as a PNG, SVG, or PDF for printing. Click Go to dashboard to finish onboarding and open the full menu editor.
If you skipped adding items, you will see an "Almost there" screen instead, with a prompt to add a menu item. Click Add menu item to return to the Menu editor and add at least one dish, then come back here to get your QR code.
You can always generate, restyle, and print QR codes later from the dashboard, so feel free to finish onboarding and come back when your menu is complete.
Still stuck? Email us at info@vino-smart.com and we will help you get your menu live.
Was this helpful?