Add categories and items to your menu
Build your digital menu: create categories and subcategories, add items with prices and photos, set visibility, reorder, and publish.
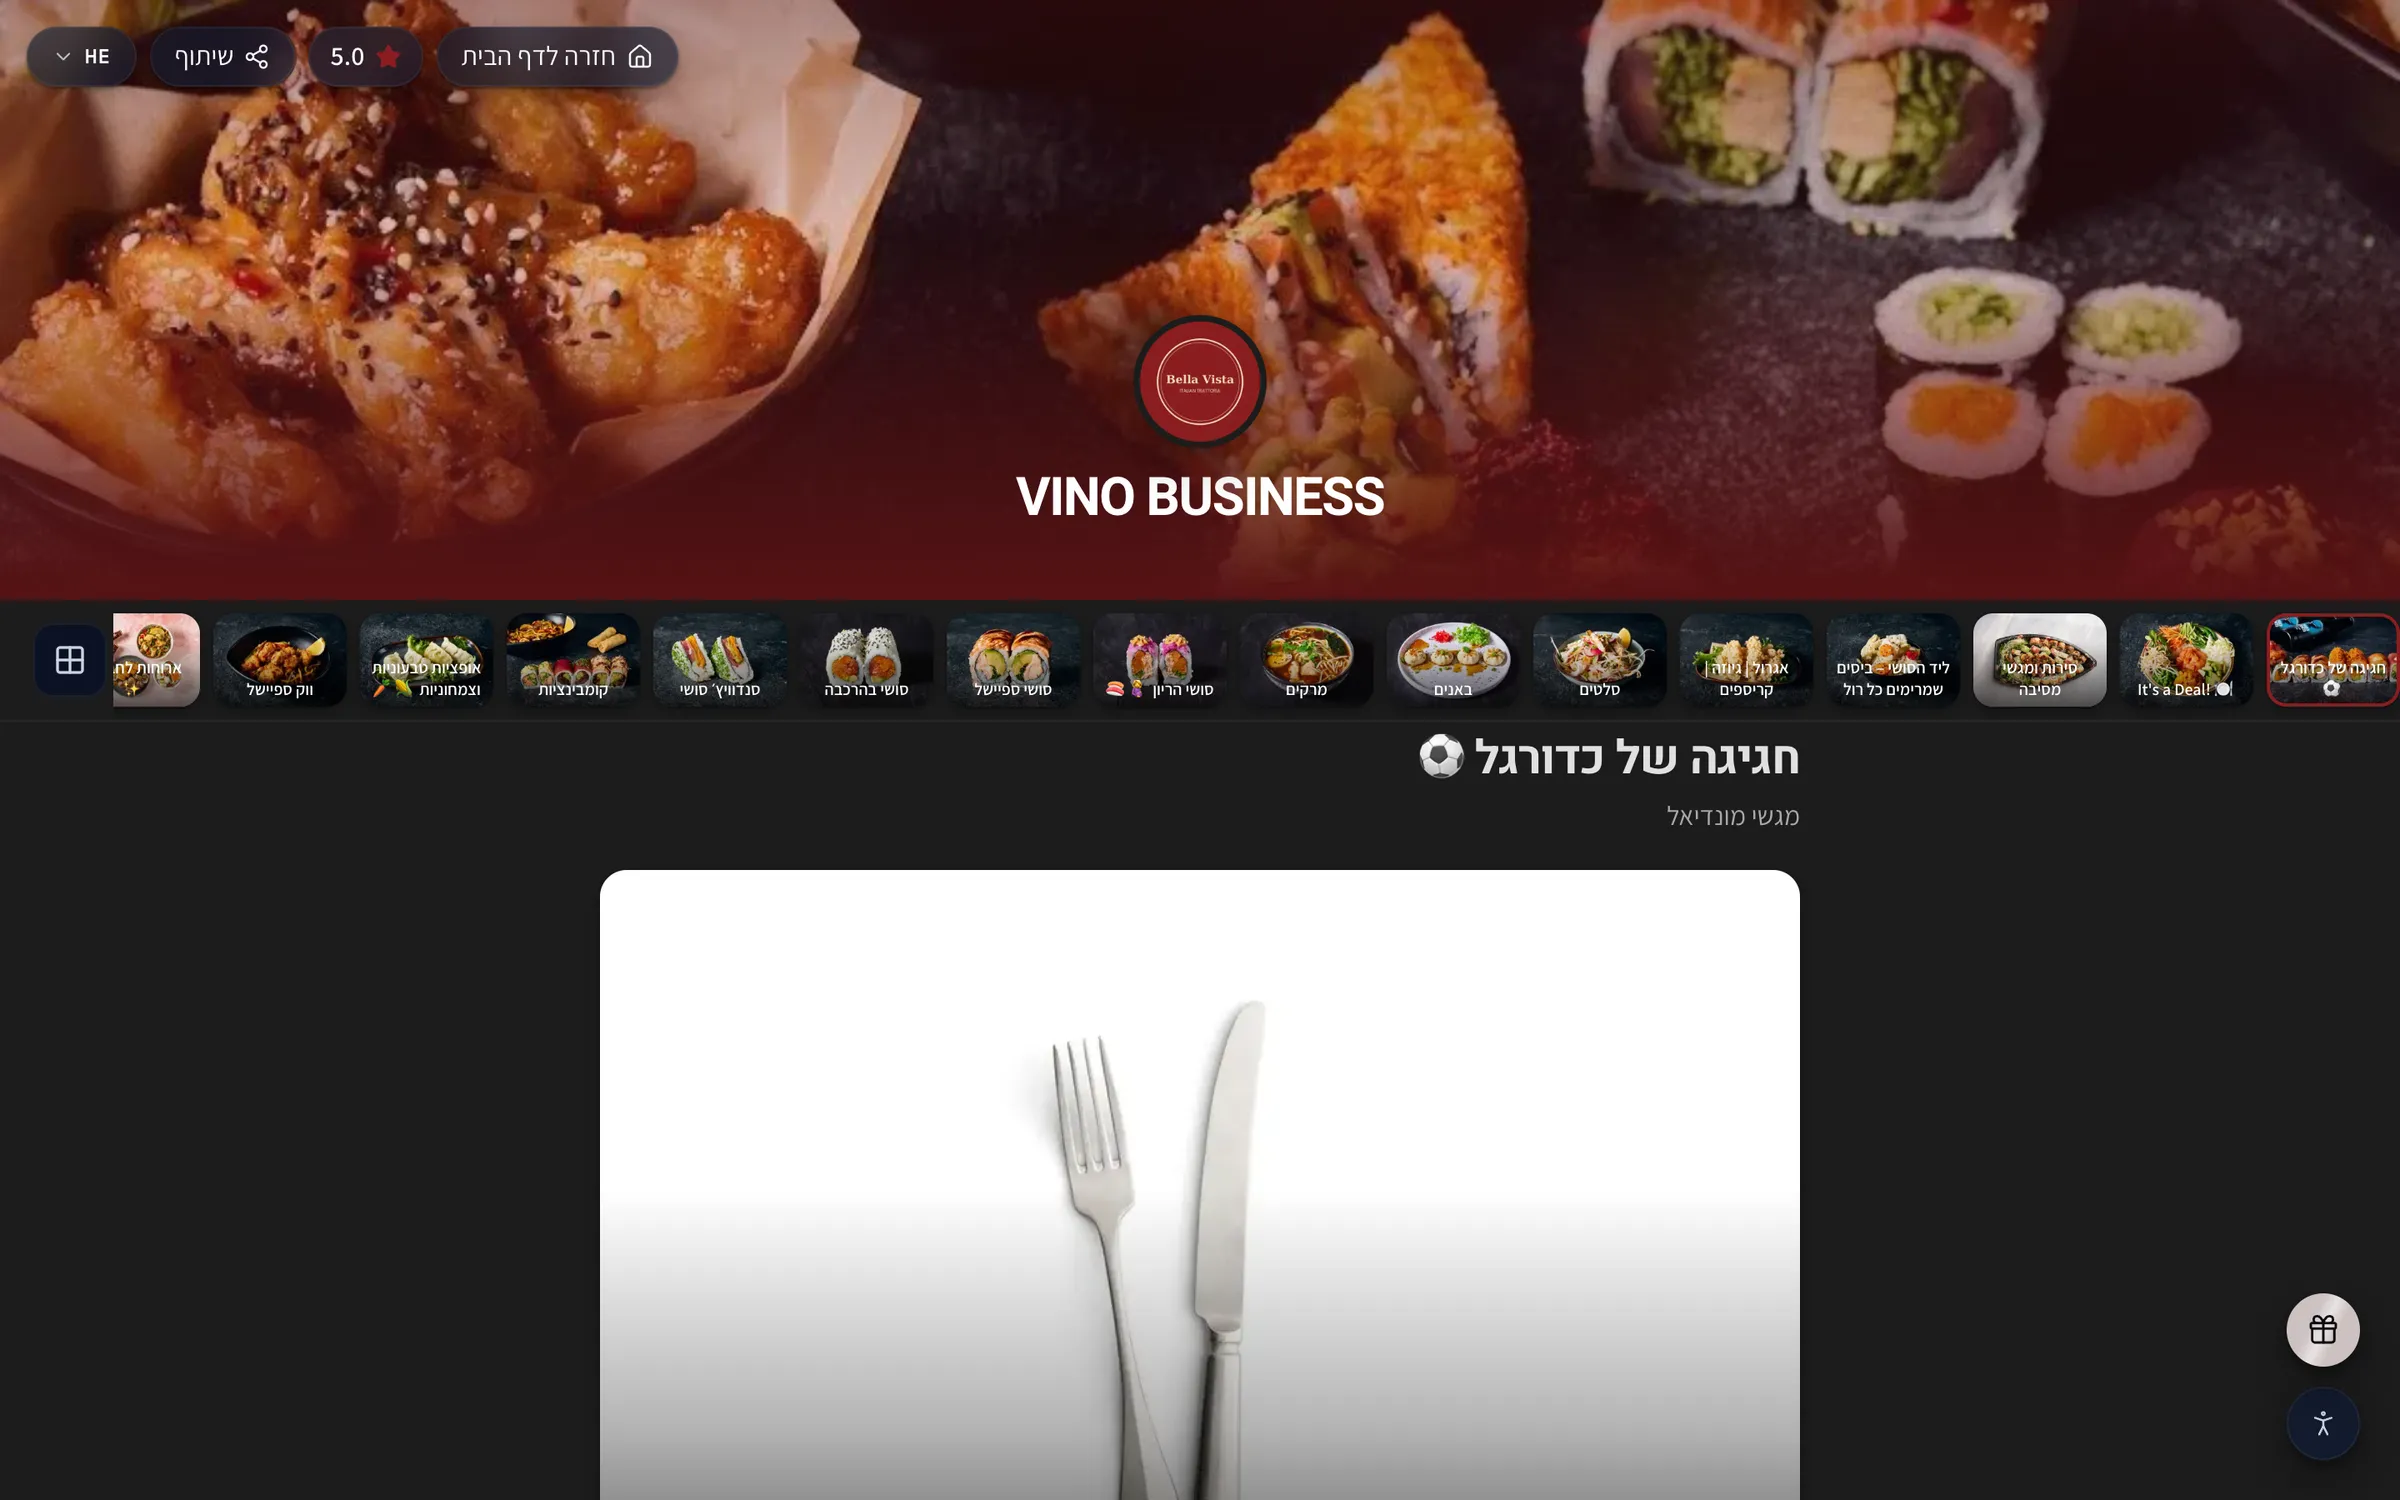
The menu builder is the core dashboard interface where you organize your digital menu. You create categories (with optional one-level subcategories), add items with names, descriptions, prices, and photos, and control exactly what diners see. Changes save immediately and publish automatically to your live public menu, so your QR menu always stays up to date.
Open the Menu page
Open the Menu page from your dashboard sidebar. The screen is split into two panes: the left sidebar lists all your categories, and the right pane shows the items in whichever category you have selected. From here you can create, edit, delete, and reorder both categories and items.

Create a top-level category
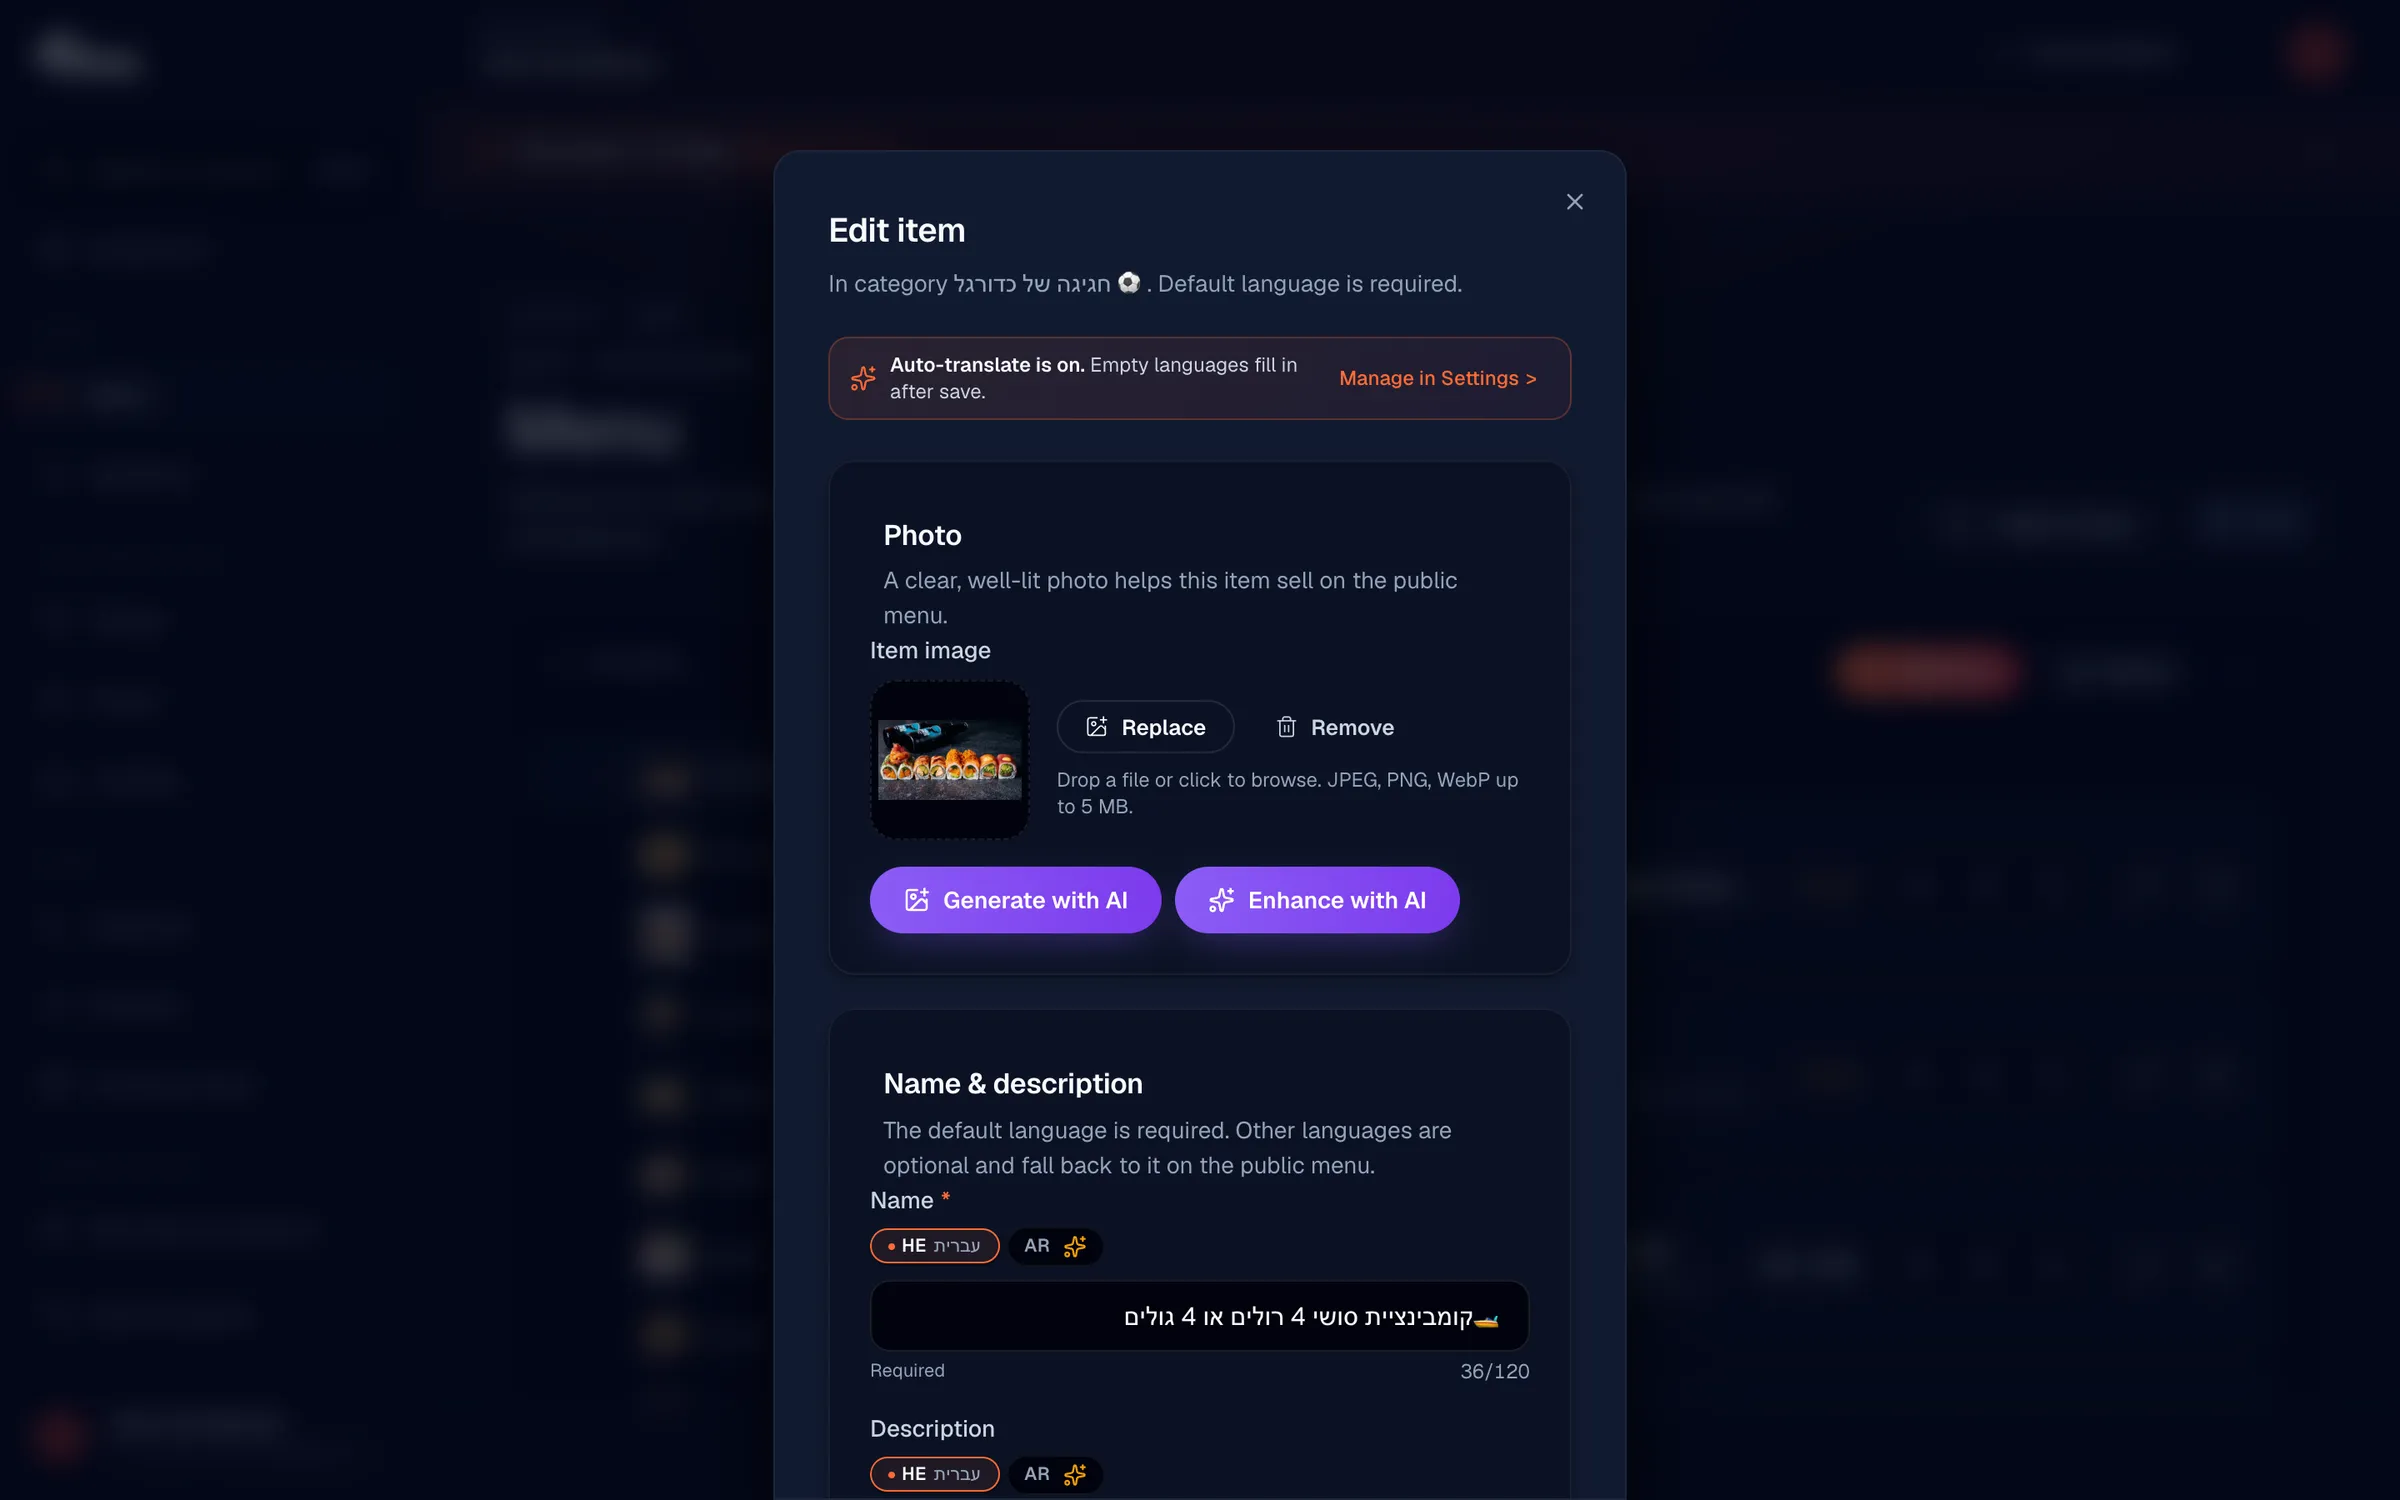
To add a section to your menu, click the + button in the sidebar or use "Add category" in the toolbar. Enter a name (required), an optional description that appears above the items in that section, and an optional cover photo. Click "Add category" to save. Names and descriptions are multilingual: the default language is required, and other languages are optional and fall back to the default if left empty.
Add a subcategory
To group items under a parent section, open an existing top-level category, click its dropdown or kebab menu, and select "Add subcategory". Subcategories appear indented under their parent. You can move a subcategory back to top-level or under a different parent at any time using the parent option in the rename view.
The menu supports one level of nesting only. Top-level categories can have subcategories, but subcategories cannot have their own children.
Reorder categories
Drag the handle icon on any category row to move it to a new position. The order you set in the sidebar is the order diners see on the public menu. Reordering is applied instantly and saved for you; if a save fails because of a network issue, the order reverts so nothing is lost.
Create a menu item
Select the category where the item belongs, then click "+ Add item" in the right pane. Fill in the name (required), an optional description, the primary price, and an optional cover image. Click "Add item" to save. Items within a category can also be reordered by dragging their handles, just like categories.
Use the description to add ingredients, prep notes, or dietary hints. It helps diners decide and reduces questions for your staff.
Edit pricing
When creating or editing an item, enter a single price (for example, 18.50) or several prices for different sizes. To add multiple prices, separate them with a slash, comma, or pipe, for example "15/18" for two sizes. The form automatically parses the separators and displays normalized prices. You can add up to 8 prices per item, and price labels are translatable.
Set item visibility and stock
In the item editor, use the toggles to control how the item appears to diners:
- Visible on menu - ON (green) shows the item to diners; OFF (gray) hides it without deleting it. Use this to stage items before they go live.
- In stock - ON marks the item as available; OFF grays it out on the public menu (for sold-out or temporarily unavailable dishes) but keeps it visible.
Mark an item as featured
To highlight a special or signature dish, find the star icon in the item row or editor and toggle it on. Featured items appear with a star badge on the public menu, helping them stand out.
Add allergens and tags
Open the item editor and scroll to "Allergens & labels". Check the allergen chips to flag any of the 14 EU-standard allergens (gluten, dairy, eggs, peanuts, tree nuts, shellfish, fish, sesame, mollusks, celery, mustard, lupin, sulphites, crustaceans). Then select existing tags or create new ones inline with "+ Add tag" (for example, Vegan, Spicy, or Chef's pick). Tags are shared across your whole account, so any item can reuse them. Both allergens and tags appear as badges on the public menu.
Add item variations
For dishes that come in sizes or styles, open "Options" in the item editor and click "Add size/variation". Enter a name (for example, "Small"), an optional price modifier, and an optional emoji icon. Set one variation as the default. You can add up to 10 variations per item, and they appear as a picker on the public menu.
Variations are simple, per-item size or style choices. For shared add-on groups like "Toppings" that you attach across many items, use modifiers instead.
Publish your changes
Every menu change publishes instantly to your live public menu at my.vino-smart.com/m/[your-slug] - there is no separate "Publish" button. Anything you mark as visible appears to diners right away, so use the visibility toggle to stage items until they are ready to go live.
Delete and restore
To remove an item or category, open its kebab menu and click "Delete". Deleted items move to Trash, where you can recover them for 30 days before they are permanently removed. This means an accidental deletion is easy to undo.
| Action | Where to find it | Effect |
|---|---|---|
| Hide an item | Item editor → Visible on menu (OFF) | Item disappears from the public menu |
| Mark out of stock | Item editor → In stock (OFF) | Item is grayed out but still shown |
| Feature an item | Star icon on the item | Star badge appears on the public menu |
| Reorder | Drag the handle on a row | Updates the order diners see |
| Delete | Kebab menu → Delete | Moves to Trash for 30 days |
Still stuck? Email info@vino-smart.com and our team will help you get your menu set up.
Was this helpful?