Set up the Customer Club and capture members
Build an owned marketing list from your menu: native or external sign-up, look, member fields, SMS/WhatsApp/Email consent, and where the club shows.
The Customer Club lets you capture diner sign-ups directly from your menu and build an owned marketing list. Diners join through a native branded sign-up form or your own embedded program, and every sign-up is stored as a structured member record that you can search, segment by consent channel, and export, so you can market to people who already love your restaurant.
Open the Customer Club and enable it
From your dashboard, go to the Grow section and click Customer Club. Then toggle Enable Customer Club to turn it on. While the club is disabled it stays in draft mode, so you can configure everything privately without it ever showing to diners. The configuration is scoped per location, and so is the member list, so each venue has its own club and its own sign-ups.
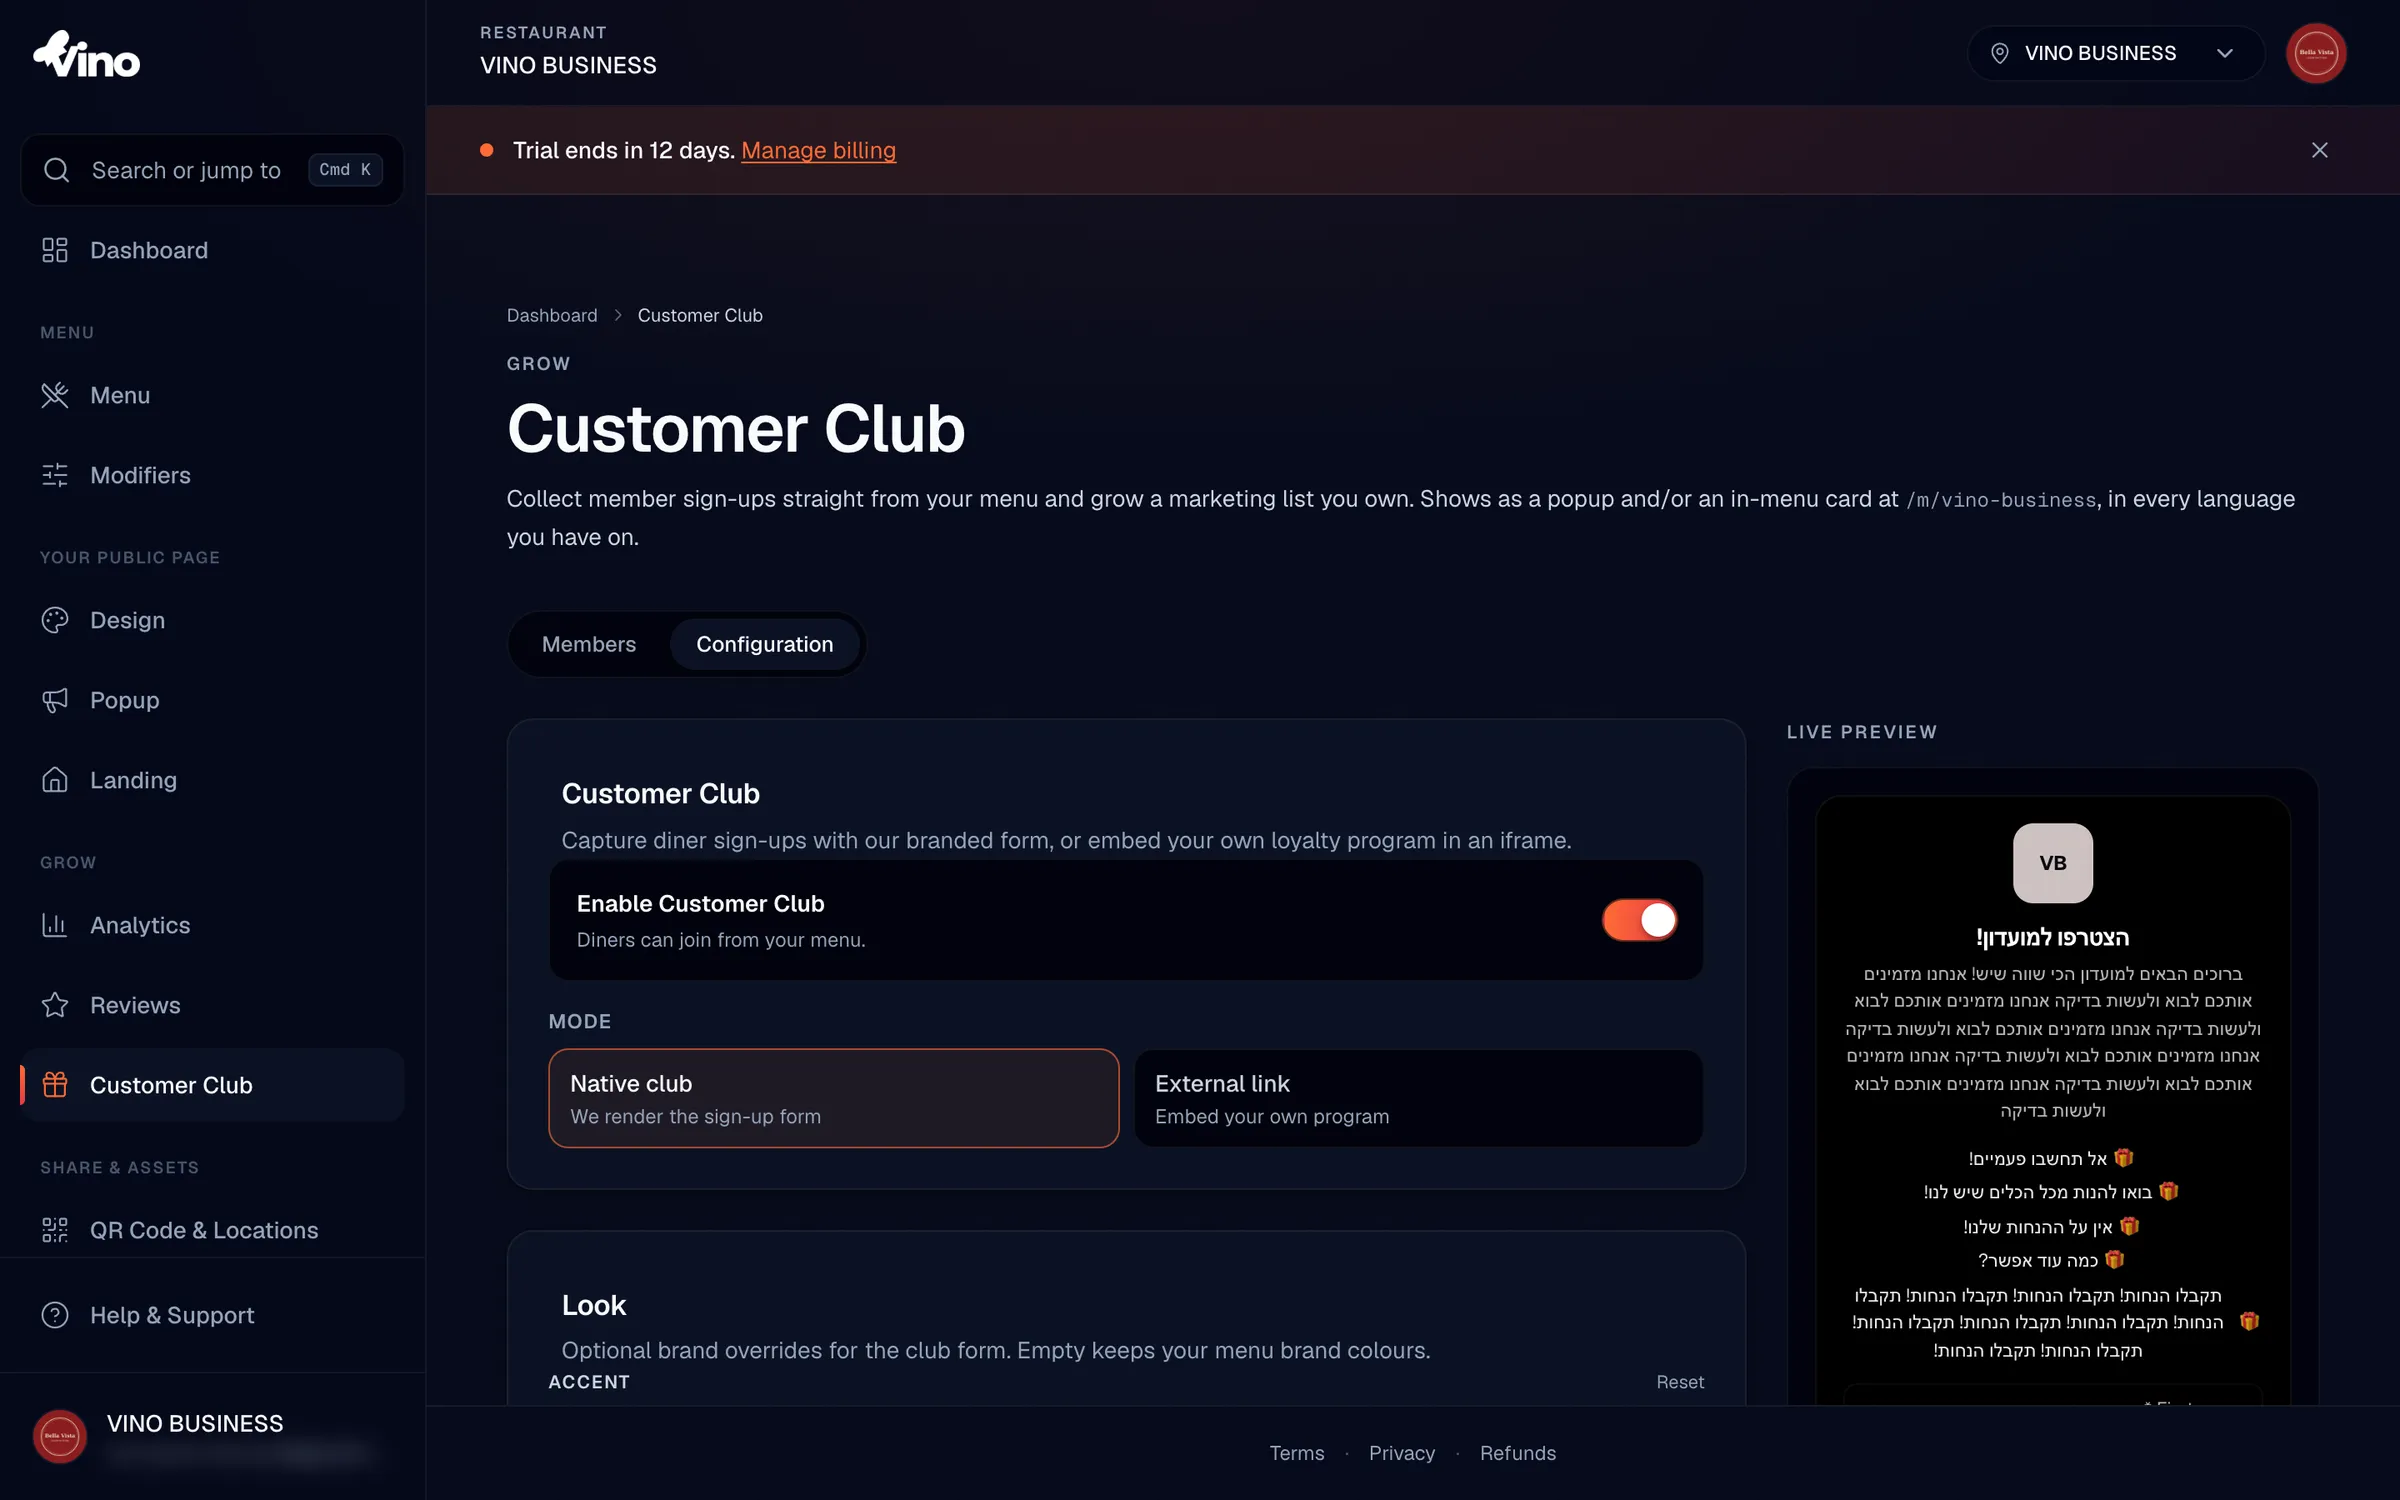
Choose your mode: native or external
Pick how diners will join. Native club has Vino render a branded sign-up form for you, with full control over copy, perks, look, member fields, and consent. External link lets you embed your own existing loyalty program in an iframe, so diners sign up inside your tool without leaving the menu. Choose native if you want Vino to collect and store members for you; choose external if you already run a loyalty platform you want to surface on the menu.
Write your title and copy
Fill in the Title that appears on the form (or above your embedded program); it supports multiple languages. For native mode, add an Intro line for a second line of copy under the title, and set the Button label for the join button (it defaults to "Join the club"). You can also add up to 8 Perks, each shown with a gift icon, to tell diners exactly what they get for joining; perks support multiple languages and can be reordered.
Style the form in the Look section
In the Look section (native mode only), you can optionally override the form's colours to match a specific campaign or brand feel. Leave any field empty to fall back to your menu's brand colours automatically.
- Accent colour - buttons and highlights
- Background colour - the form background
- Text colour - auto-picks a readable contrast if you leave it blank
The live preview on the right reflects every unsaved change, so you can fine-tune colours and copy and see exactly what diners will see before you save.
Set your member fields
Under Member fields, decide what data you collect. First name and Mobile are always collected and can't be turned off. Toggle on Last name to require it, and toggle on Email and Birthday to show those optional fields (a birthday is handy for birthday promotions). You can also add up to 12 custom fields for structured data like a member card ID or t-shirt size: click Add Field, then give it a key (such as memberCardID), a label, and a type.
| Field | Behaviour |
|---|---|
| First name | Always collected, required |
| Mobile | Always collected, required (uniquely identifies a member) |
| Last name | Optional toggle; required when turned on |
| Optional toggle; shows an optional email field | |
| Birthday | Optional toggle; shows an optional date field |
| Custom fields (max 12) | Text, number, date, or dropdown; each can be marked required; labels support multiple languages |
Members are uniquely identified per location by phone number. If a diner signs up again with the same number, their existing record is updated rather than duplicated.
Configure consent and channels
Under Consent & channels, select which marketing channels you want diners to opt into: SMS, WhatsApp, and Email. Enabling at least one is recommended so you have permission to reach members later. Then enter the Consent text that appears next to the mandatory join checkbox; it should clearly name the channels diners are agreeing to. When a diner ticks the checkbox, consent is granted for all the channels you enabled, and the wording is shown in the diner's menu language and logged for your audit trail.
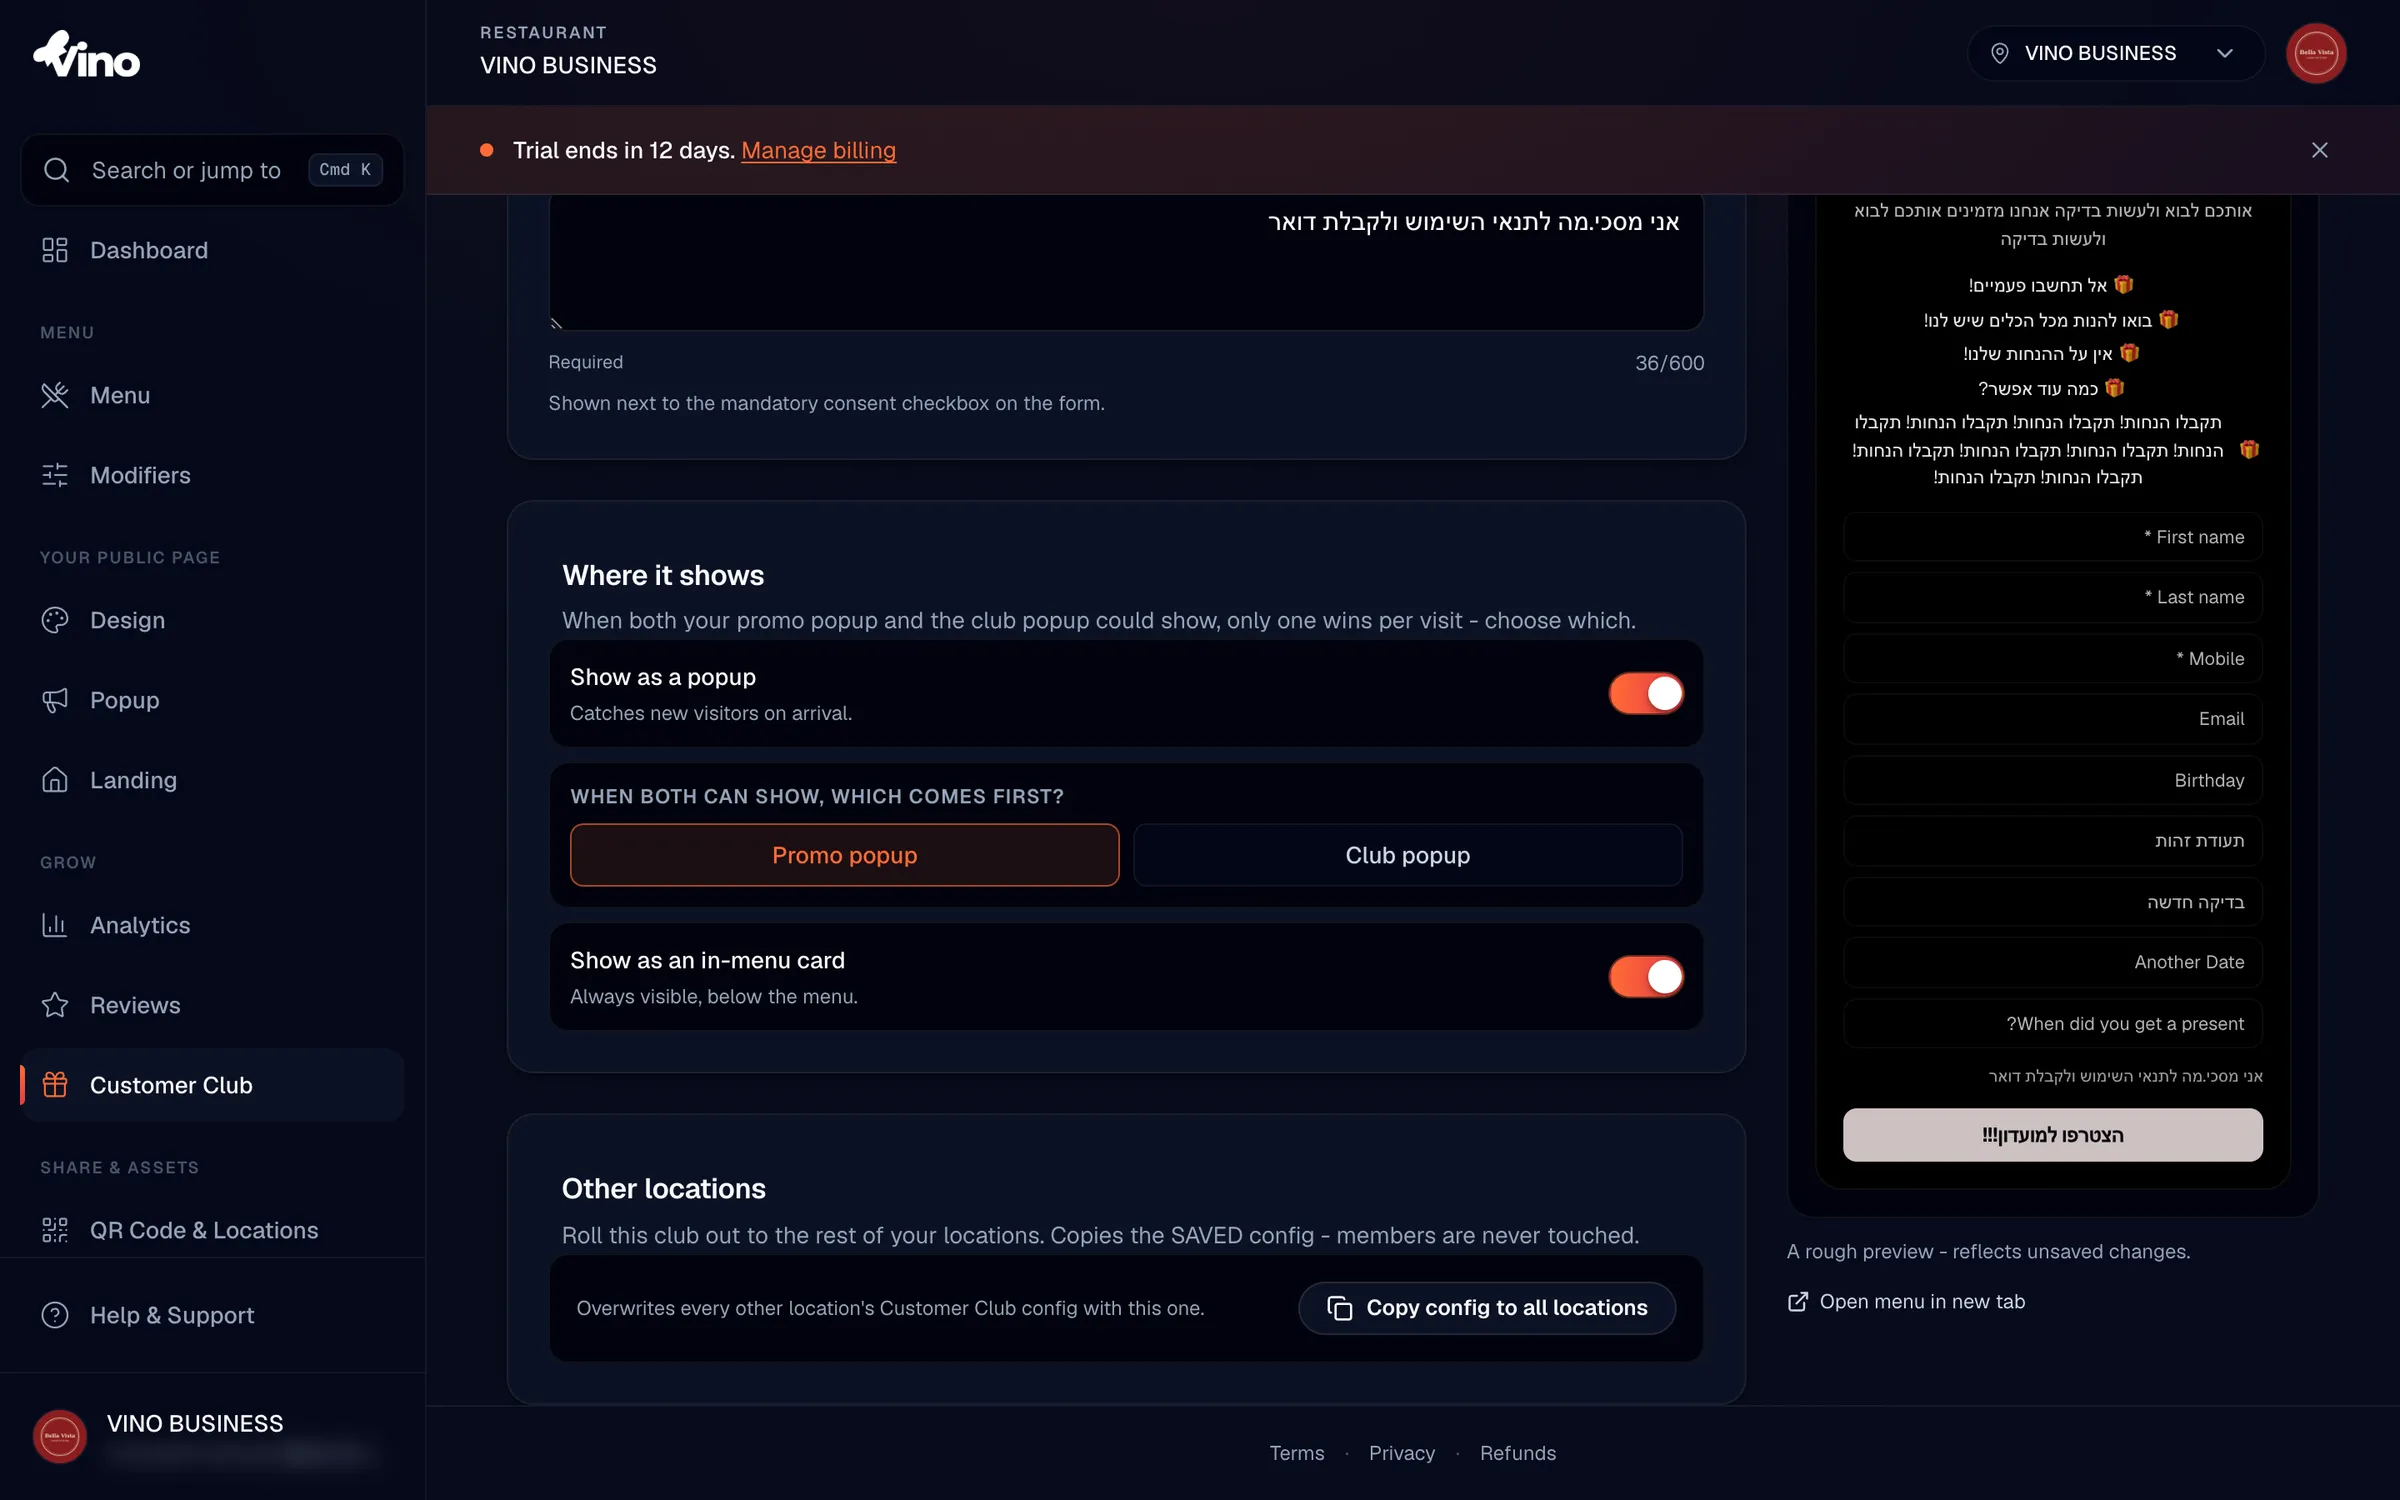
Decide where the club shows
Go to Where it shows to control how diners encounter the club. Toggle Show as a popup to greet arrivals with the sign-up dialog, and/or toggle Show as an in-menu card to keep a persistent join card below the menu. You can use either, both, or neither.
- Popup - appears when diners arrive, great for catching first-time visitors
- In-menu card - always visible below the menu, showing the title, up to 3 perks, and a Join button
- Popup priority - when both a club popup and a promo popup are active, choose which one shows first
Finish the external link setup (external mode only)
If you chose External link, paste your program's full URL into the Program URL field. The URL must be public HTTPS and can't point to a private or loopback host. Add a Fallback link label (for example, "Open loyalty program in a new window") so that if a browser blocks embedding or the URL can't be framed, diners still get a working link that opens your program in a new tab.
Save your club and copy it to other locations
Click Save club to publish your configuration; the live preview confirms what diners will see. If you run more than one restaurant, open Other locations and click Copy config to all locations to apply the same setup everywhere. This copies only the configuration, not member records, so each location keeps its own independent sign-up list.
View and manage captured members
Switch to the Members tab to see everyone who has joined. You can search by name or phone number, sort by name, phone, birthday, or join date, and filter by marketing channel consent so you can target the right audience. Use Export CSV to download your list for outside campaigns, Import CSV to bring in existing members, and delete individual records as needed. Member records are private to your restaurant team; diners can never see the list.
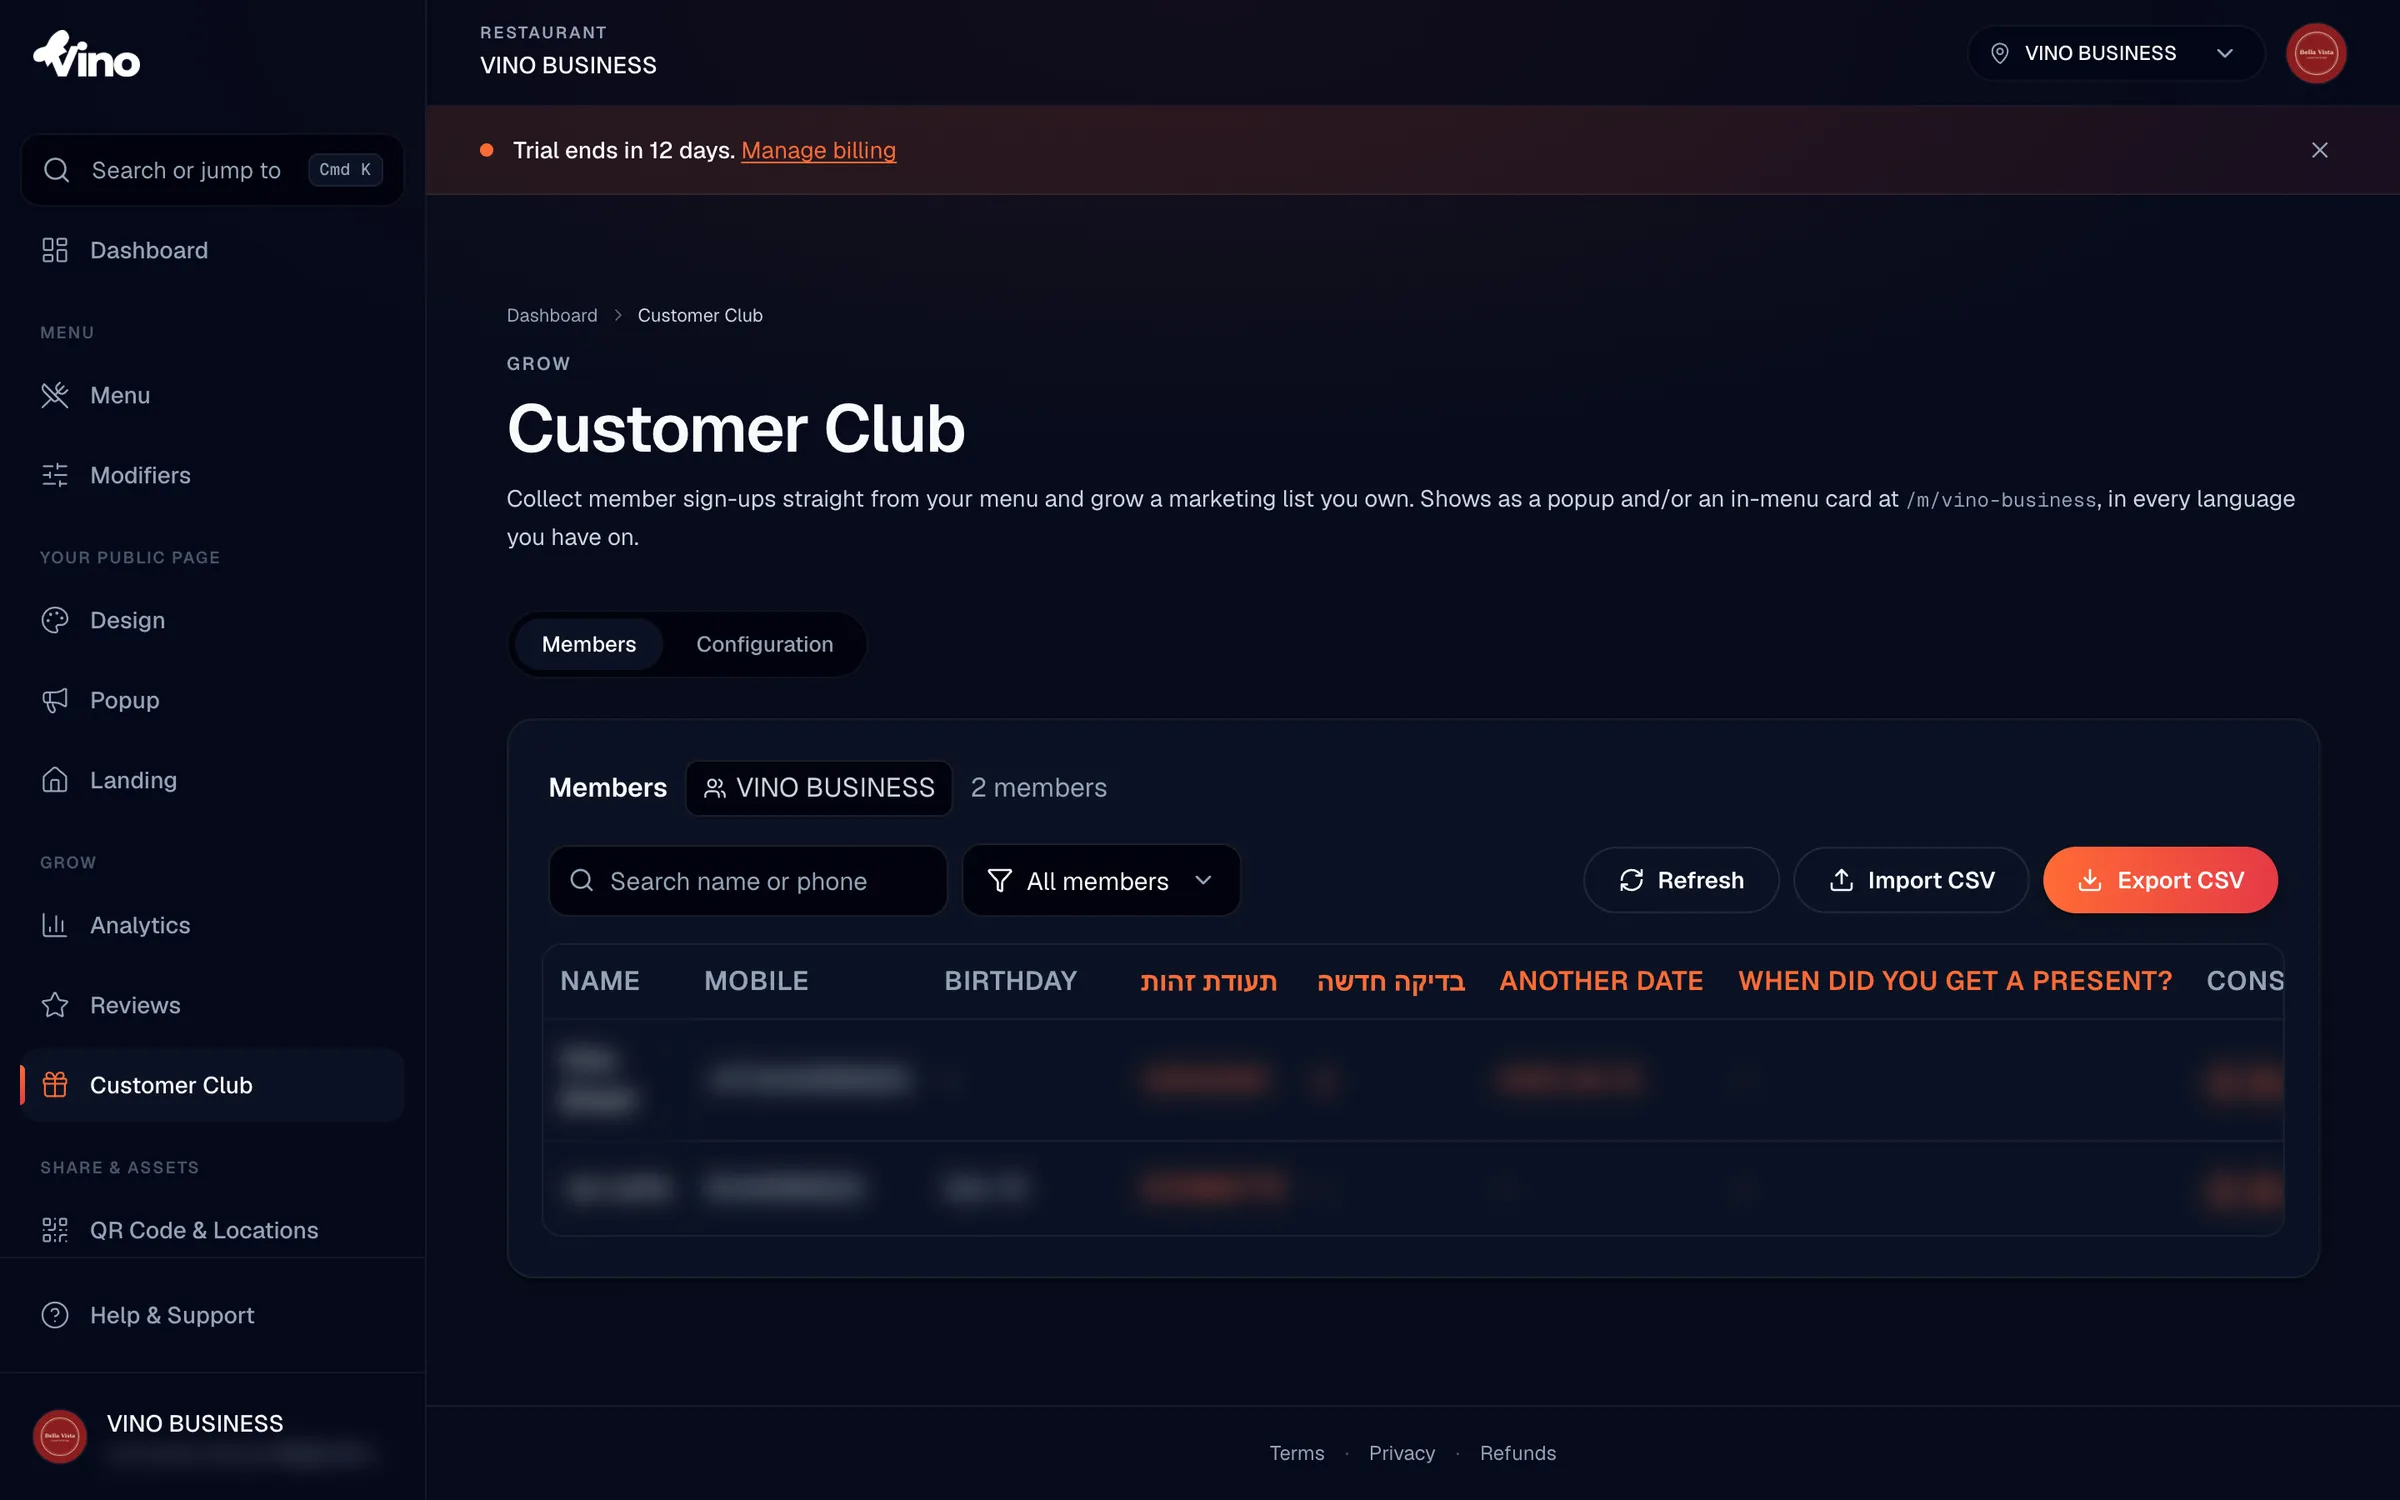
Deleted member records are soft-removed, so they leave your active list but aren't lost forever if you need to recover history.
Still stuck? Email us at info@vino-smart.com and we'll help you get your Customer Club live.
Was this helpful?